Docs
A step-by-step guide for extracting data from any website. No programming required.
Quick Tutorial
The Core Principle
All web scraping follows one simple idea:
Find a list → handle pages → get details.
That’s it. Every website you will ever scrape is some variation of this pattern. Before you touch the tool, take a moment to browse the target website and ask yourself three questions:
- Where is the list? — The page that shows repeating items (products, articles, names, rows).
- Does it have multiple pages? — Look for “Next” buttons, page numbers, “Load More”, or infinite scroll.
- Do I need to click into each item for more info? — If the list only shows a title but you also need a description, price, or author that lives on a separate page, that’s a detail page.
Your answers determine which of the four scraping patterns applies:
| Pattern | List | Pagination | Detail |
|---|---|---|---|
| List | ✅ | — | — |
| List + Paginated | ✅ | ✅ | — |
| List + Detail | ✅ | — | ✅ |
| List + Paginated + Detail | ✅ | ✅ | ✅ |
You don’t need to select a pattern manually — the scraper figures it out based on the choices you make during setup.
Before You Begin
Browse the website first. Familiarize yourself with how the site is laid out — where the list is, how pagination works, and what data lives on detail pages. Making a mistake during setup means starting over, so spending a minute exploring upfront saves time later.
Step-by-Step Walkthrough
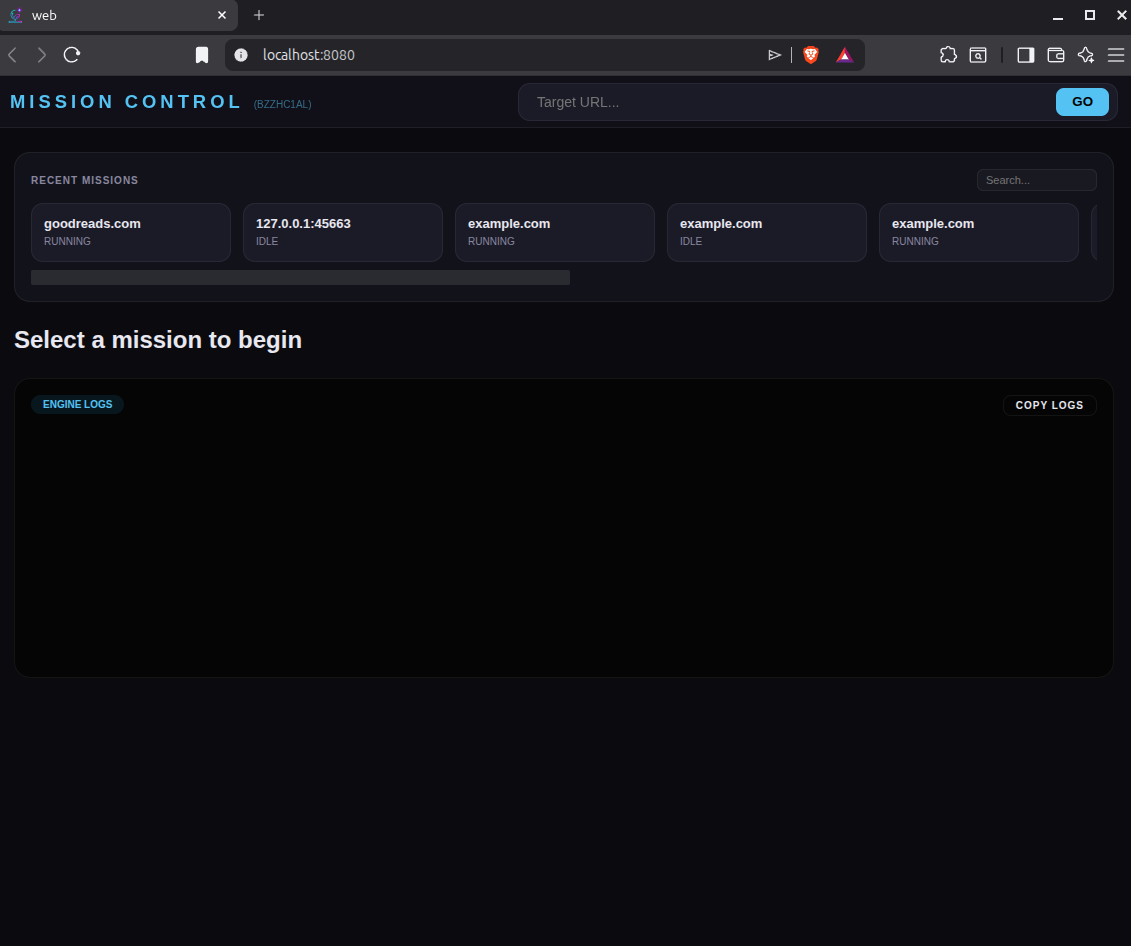
Step 1 — Launch Mission Control
Open your terminal and run:
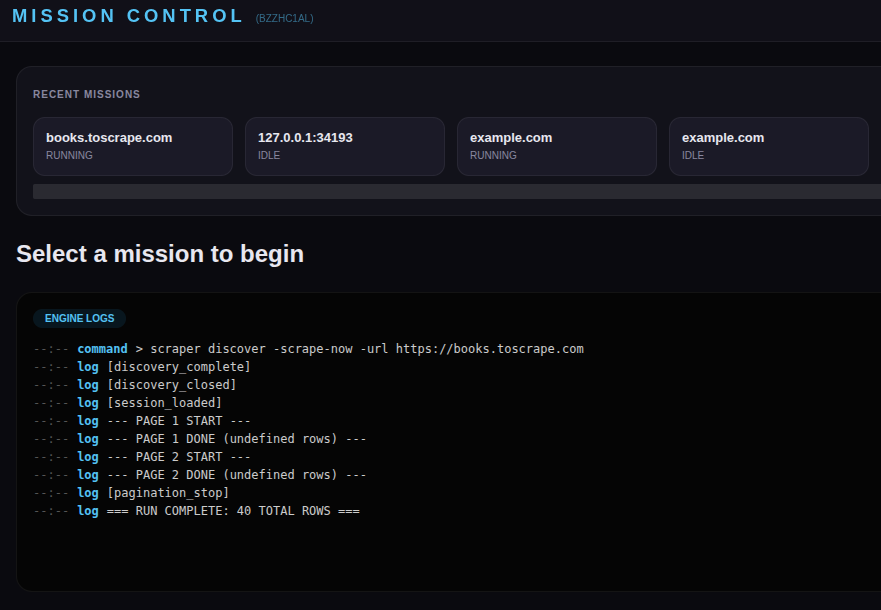
scraper uiYour browser opens to the Mission Control dashboard. This is your home base — it shows all your recent scraping projects and their status.
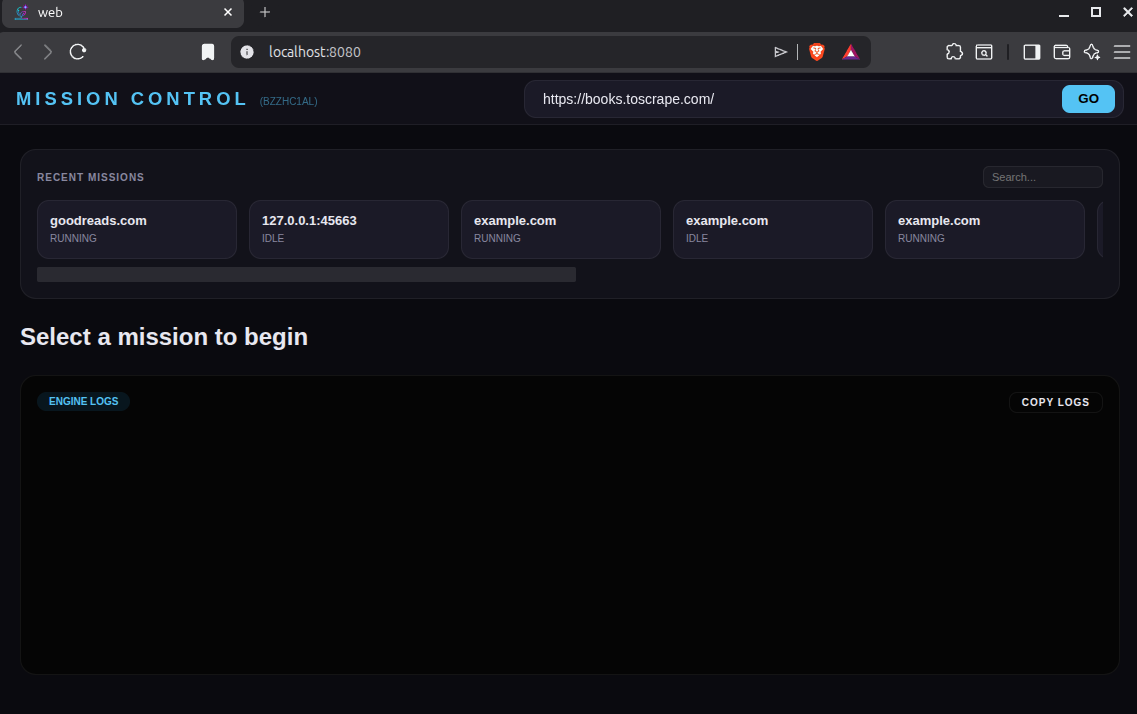
Step 2 — Enter the URL
In the Target URL input box at the top of the dashboard, paste the link to the page that contains your list of items, then click GO.
Important: The URL you enter must be the page that already shows the list, even if the list only has one item. Do not enter a homepage or a login page — enter the page where the actual data is.
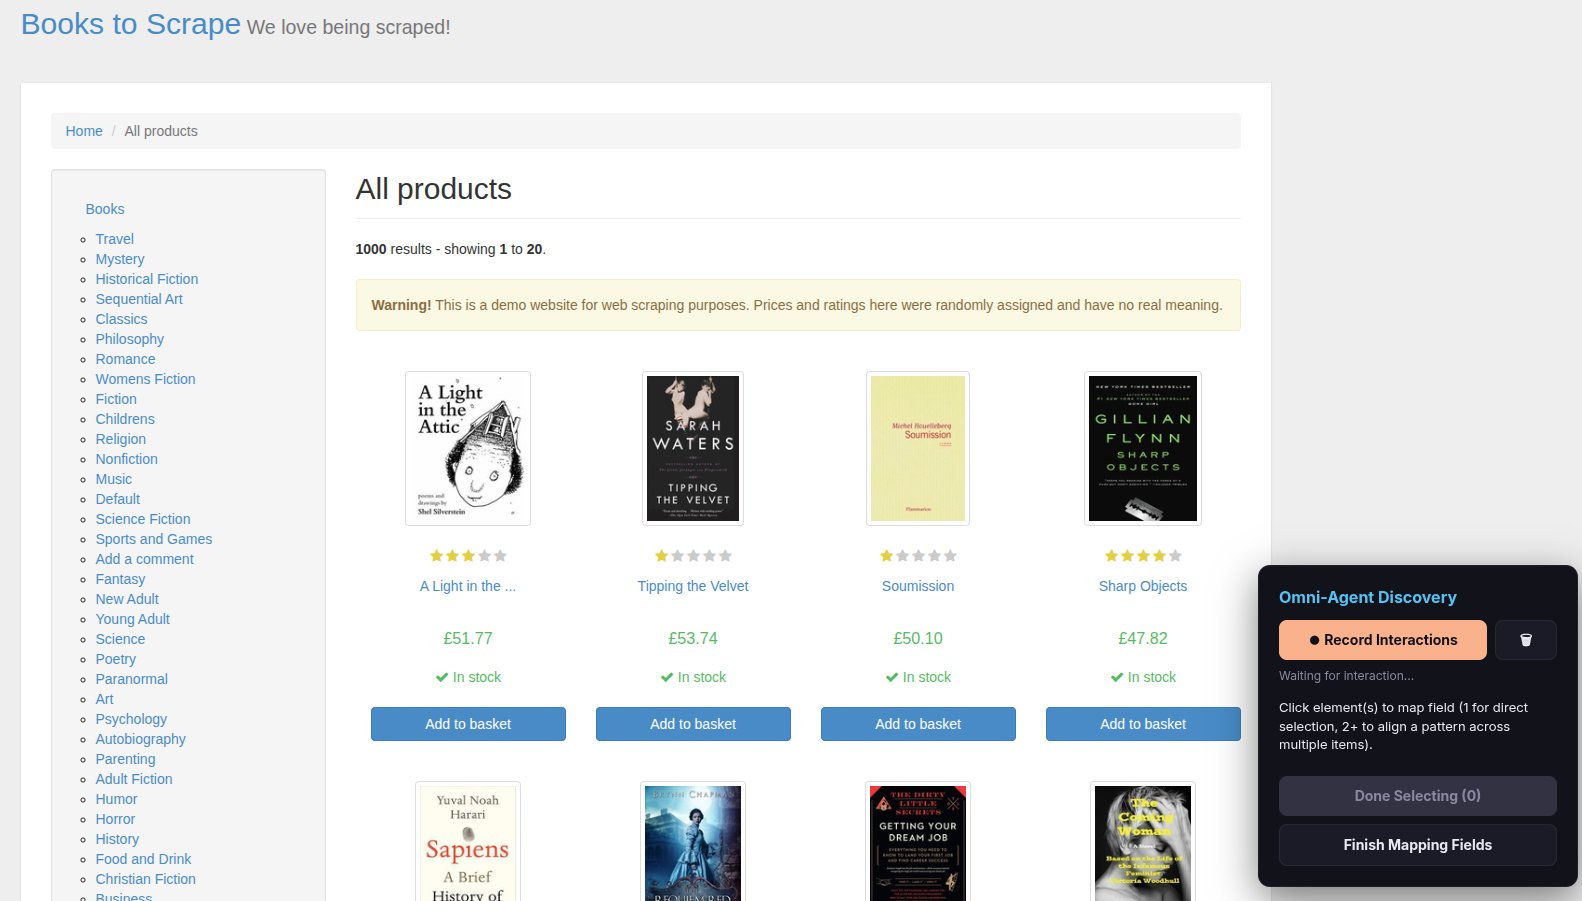
A new Chrome window opens showing the website with the Omni-Agent Discovery overlay panel in the bottom-right corner. This overlay is your control panel for the entire setup process.
Step 3 — Select list items (establish the pattern)
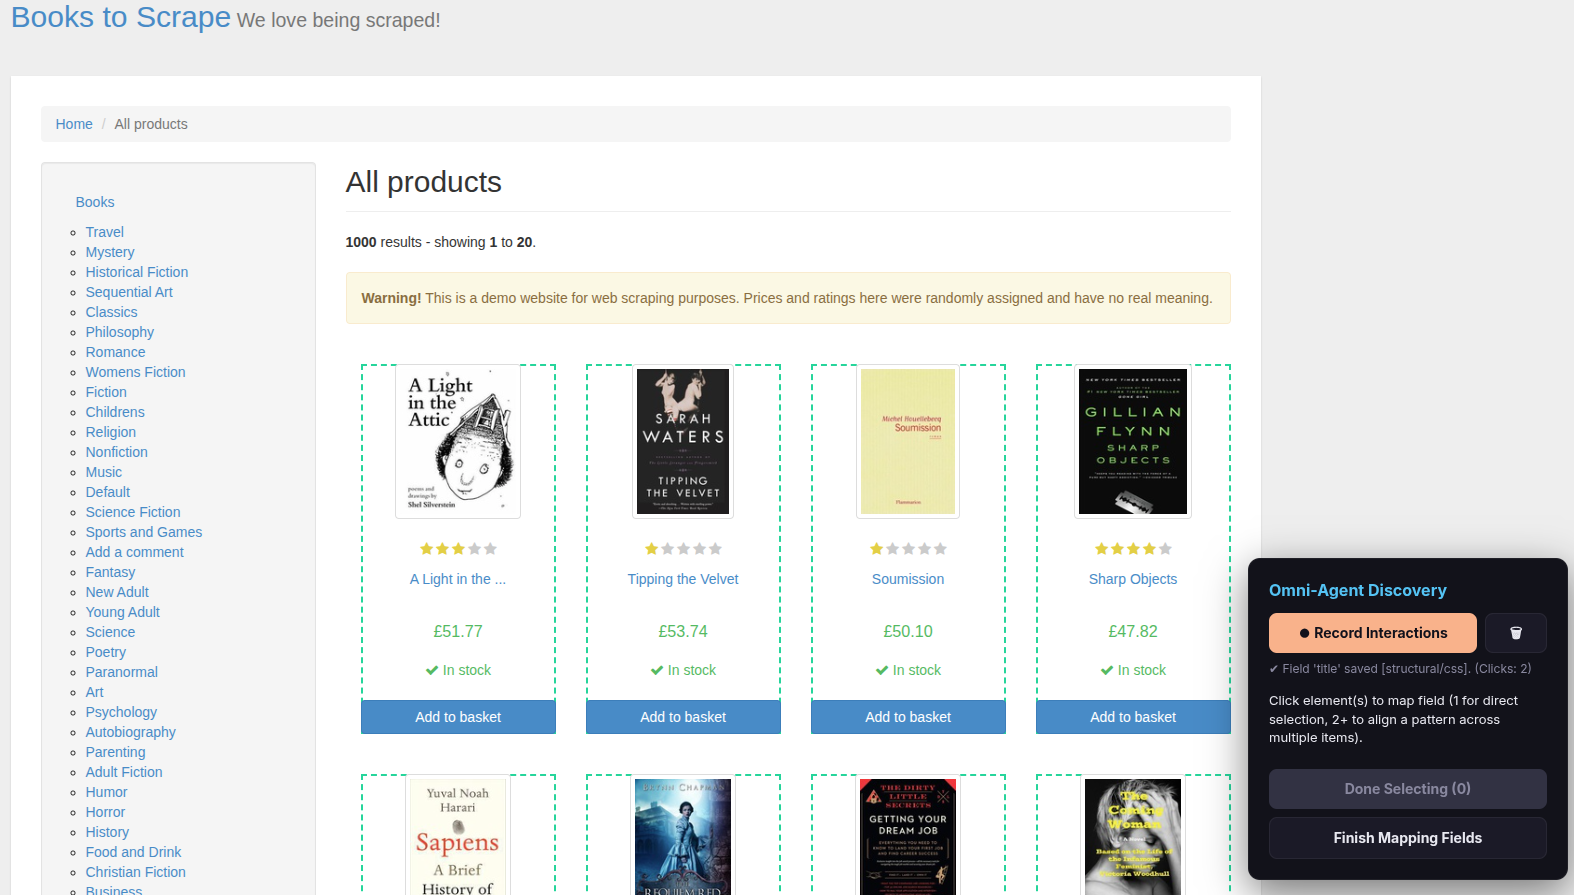
The overlay says: “Click element(s) to map field.” Now you teach the scraper what a “list item” looks like.
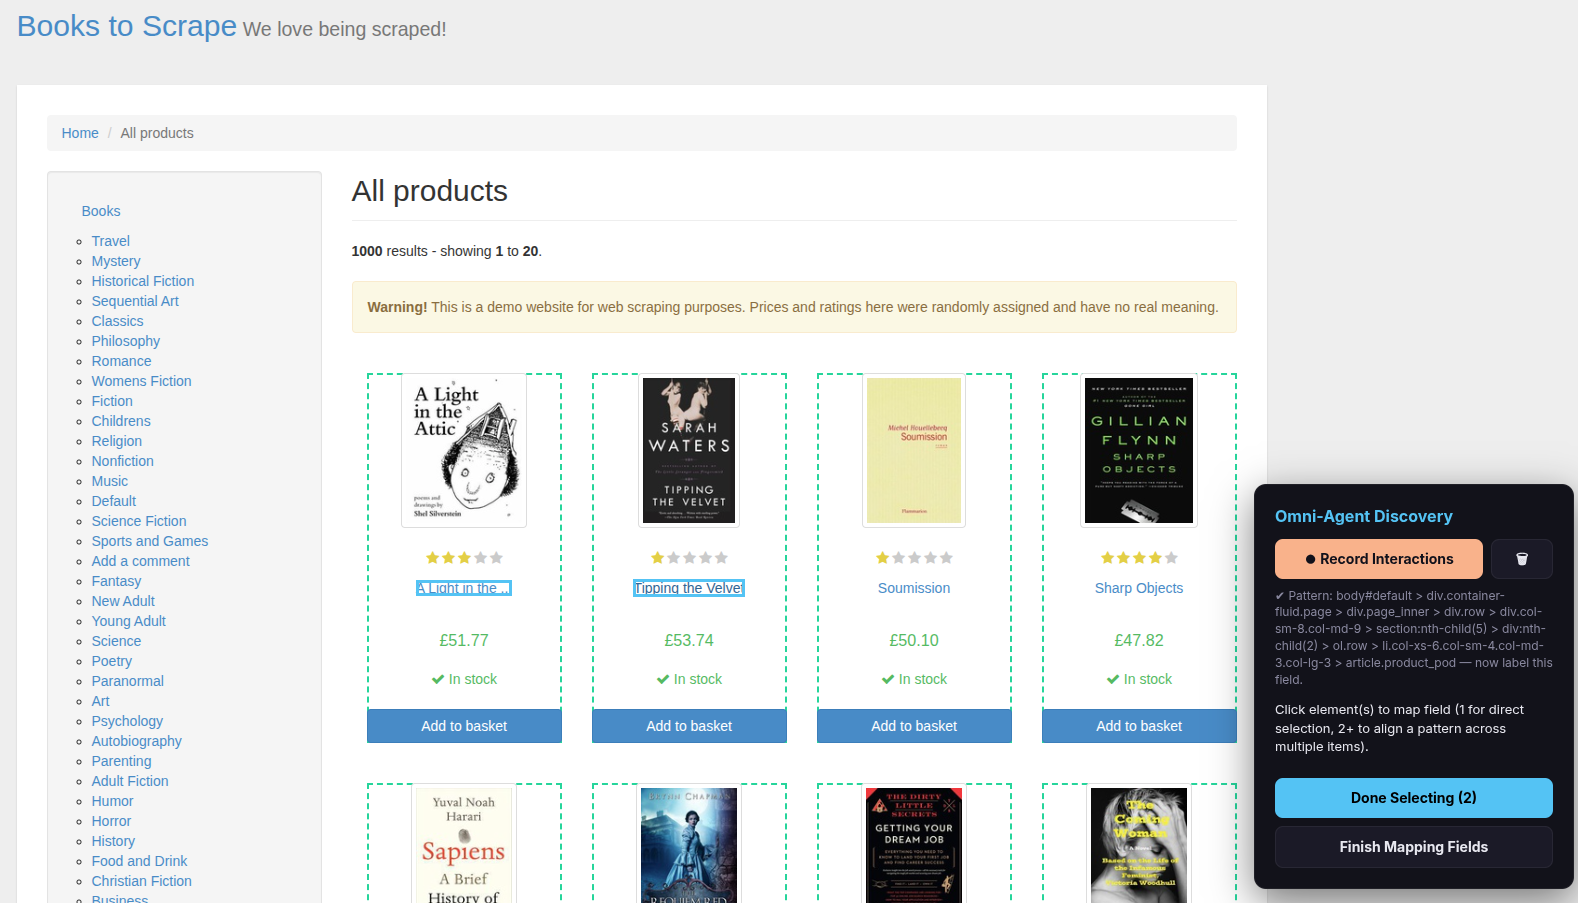
- Click the first item in the list (e.g., a book title). It gets highlighted.
- Click the second item of the same kind (e.g., the next book title). The scraper detects the pattern and highlights all matching items on the page with a dashed border.
- Click Done Selecting.
Why two clicks? The scraper needs at least two examples to understand the repeating pattern. One click selects a single element; two clicks reveal the pattern across the entire page.
Undo a misclick: If you accidentally click the wrong element, just click it again to deselect it.
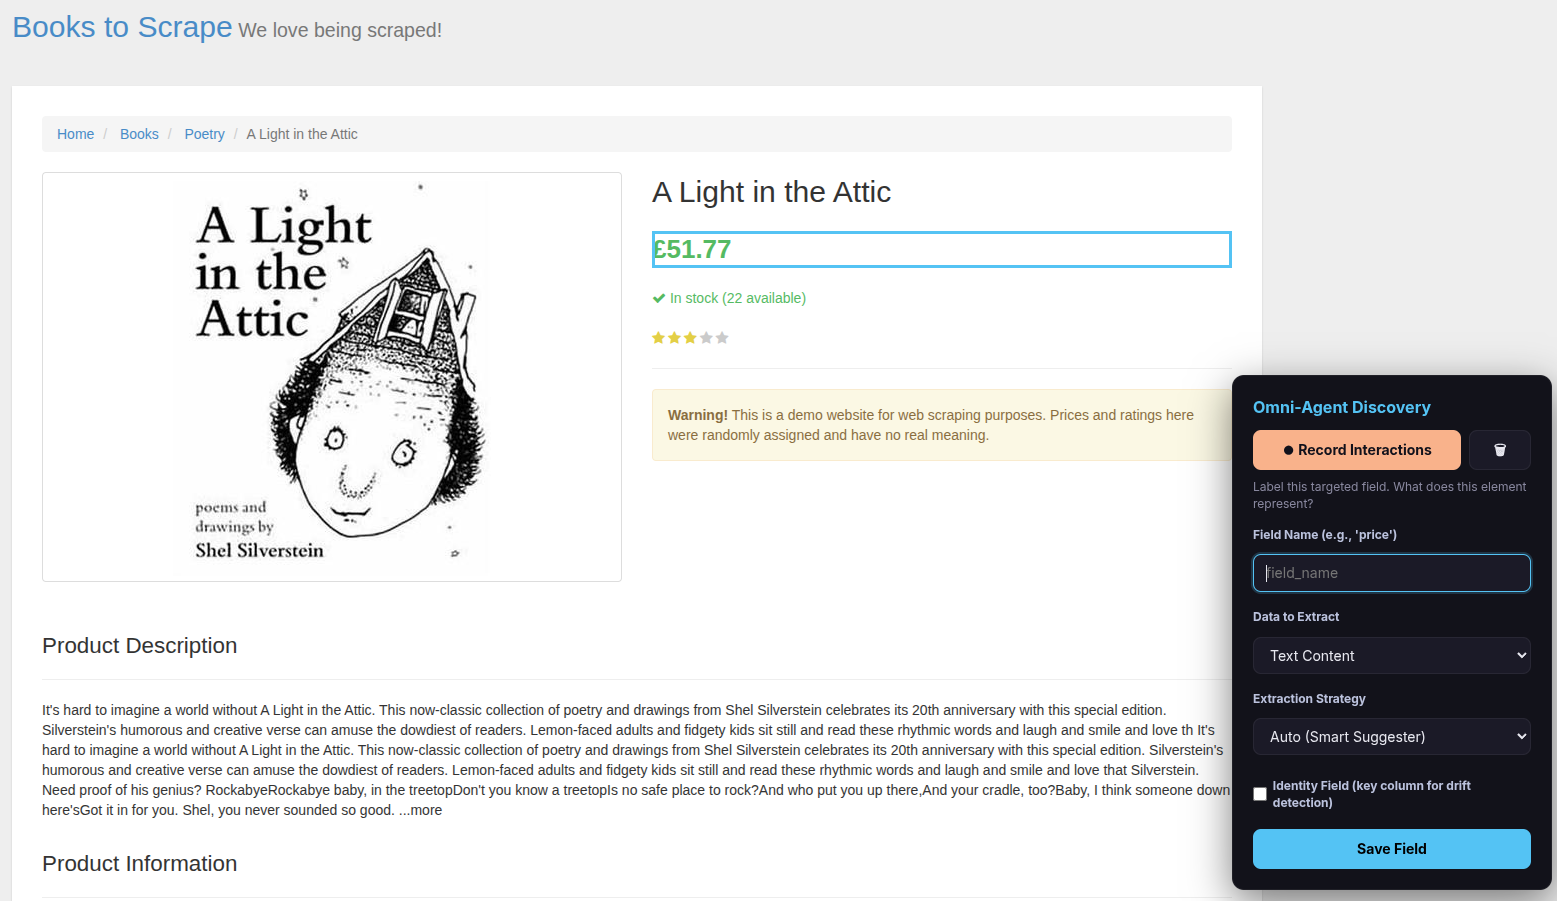
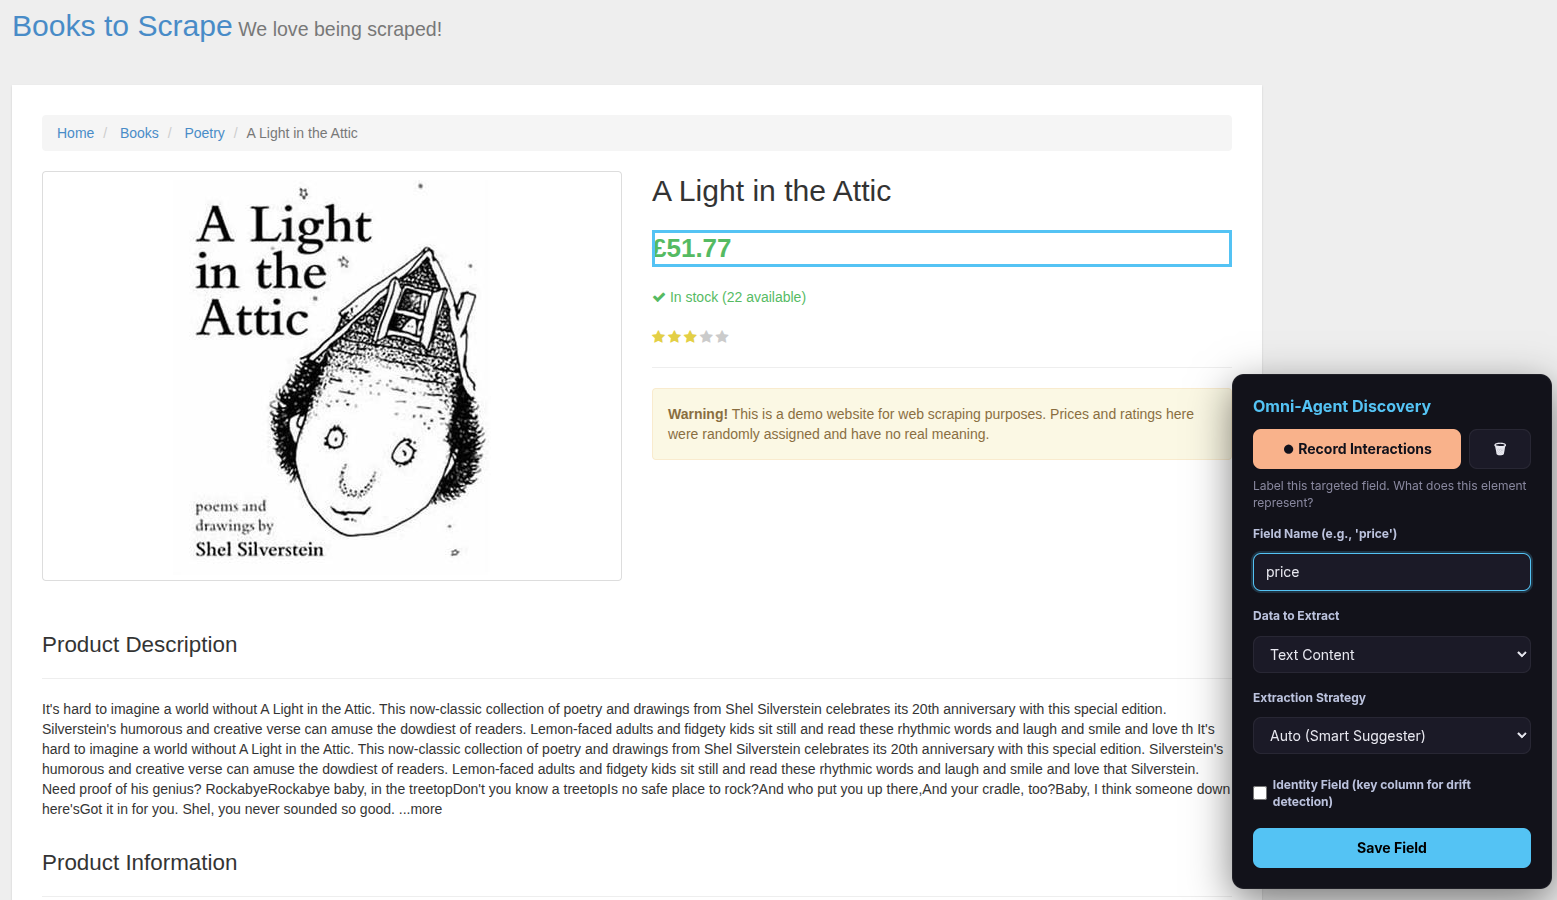
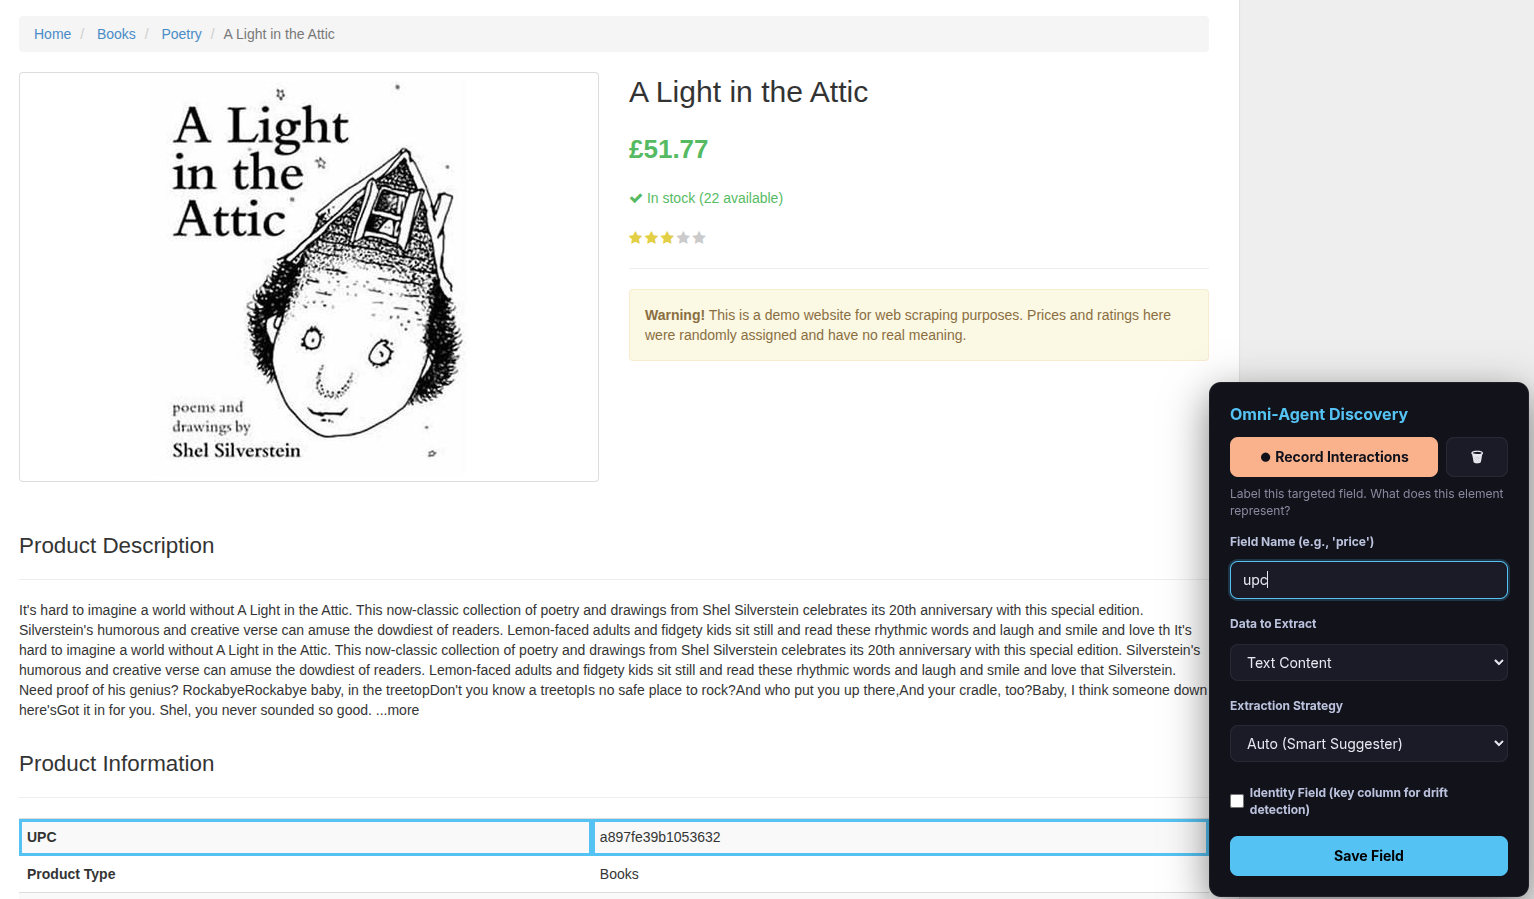
Step 4 — Name and save the field
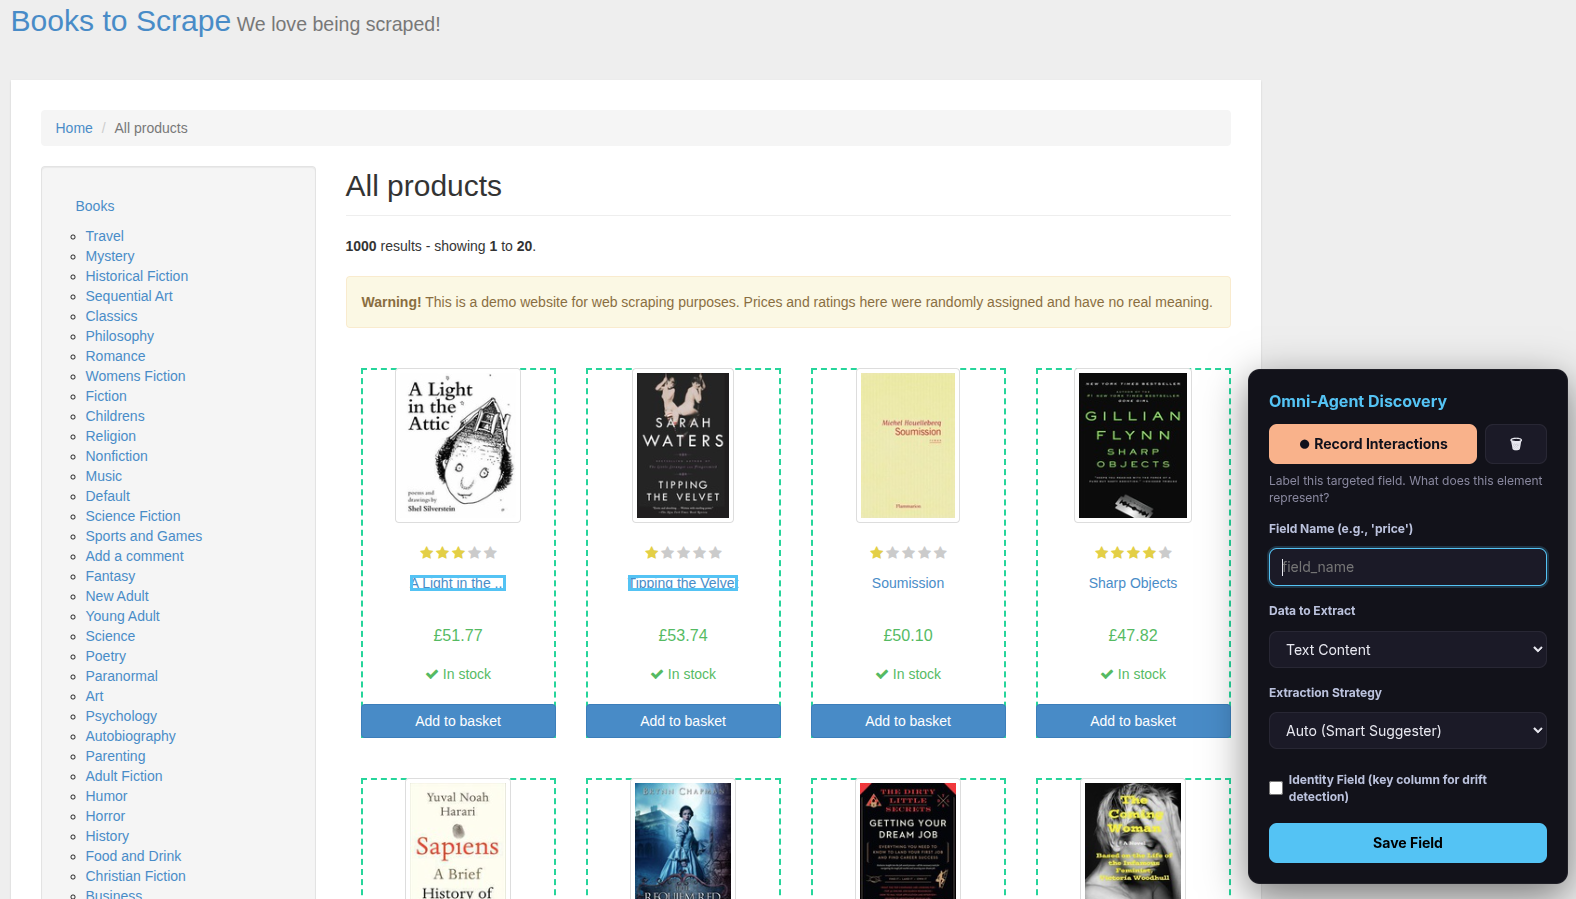
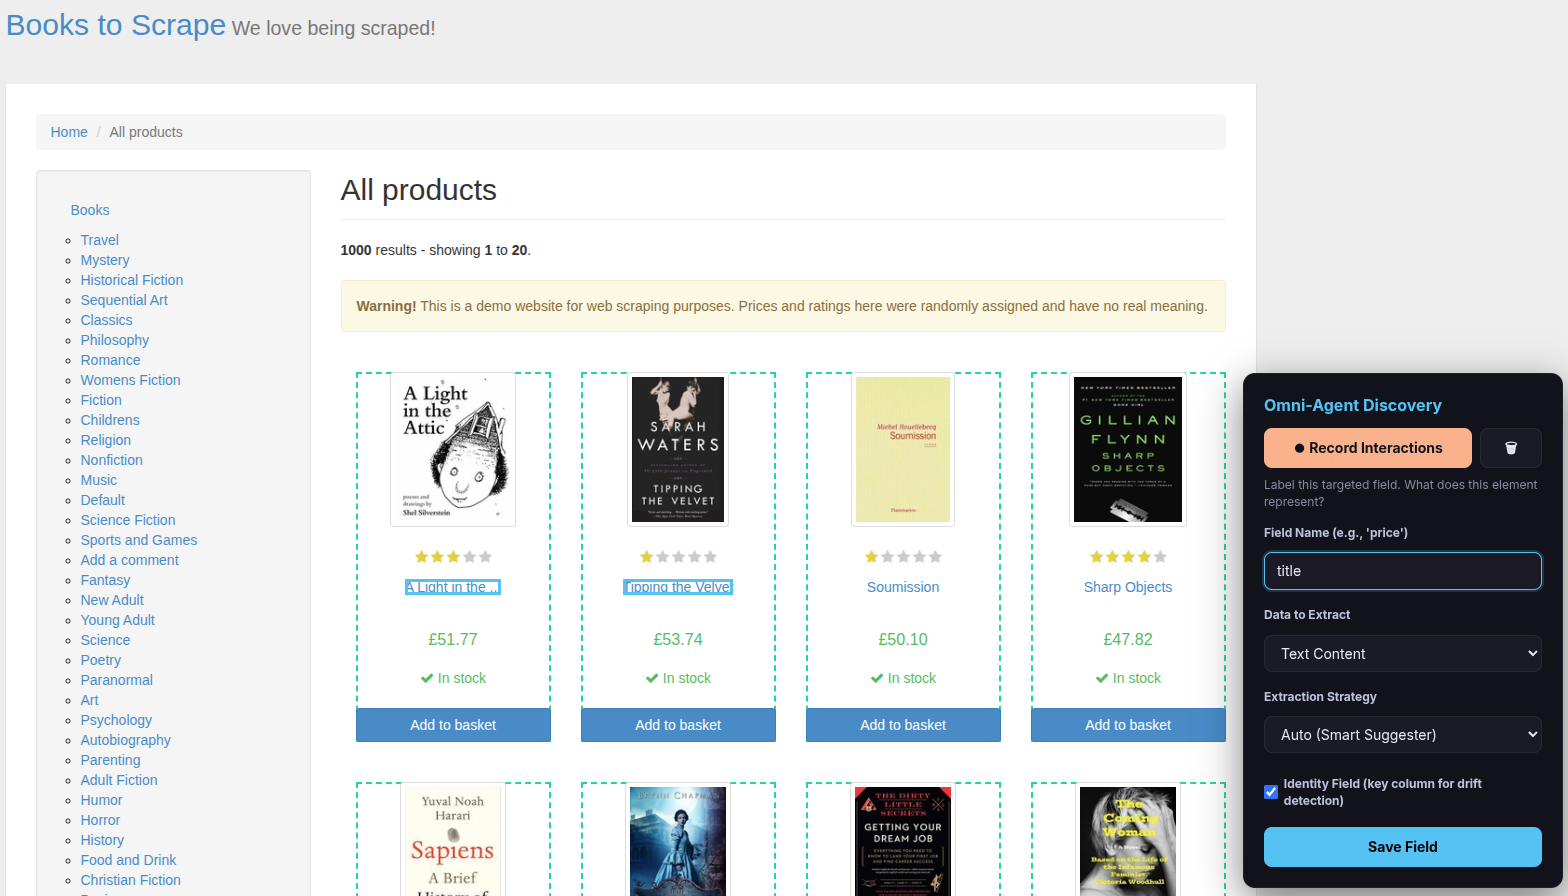
After clicking Done Selecting, the overlay asks you to label the field:
- Type a Field Name (e.g.,
title,price,author). - Check the “Identity Field” checkbox — this tells the scraper which field uniquely identifies each item (important for data quality monitoring).
- Choose Data to Extract (usually leave as “Text Content”; change to “Link URL (href)” for links or “Image URL (src)” for images).
- Choose Extraction Strategy (usually leave as “Auto (Smart Suggester)”).
- Click Save Field.
Step 5 — Add more fields or finish
You can repeat Steps 3–4 to add more fields from the list (e.g., price, rating, image URL).
When you have mapped all the fields you need from the list, click Finish Mapping Fields.
Step 6 — Set up pagination
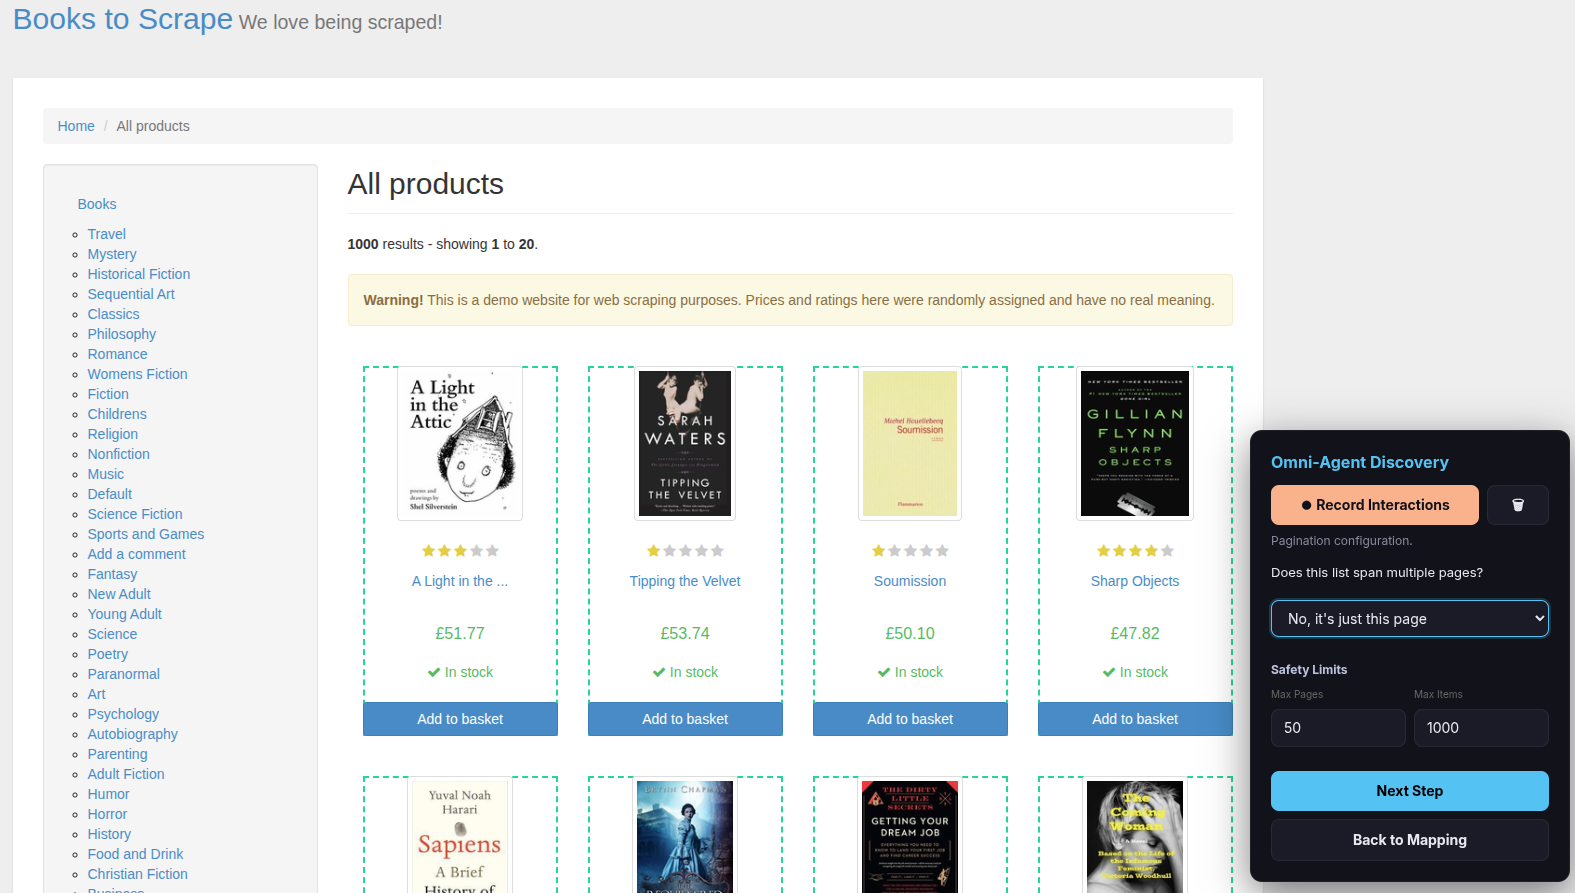
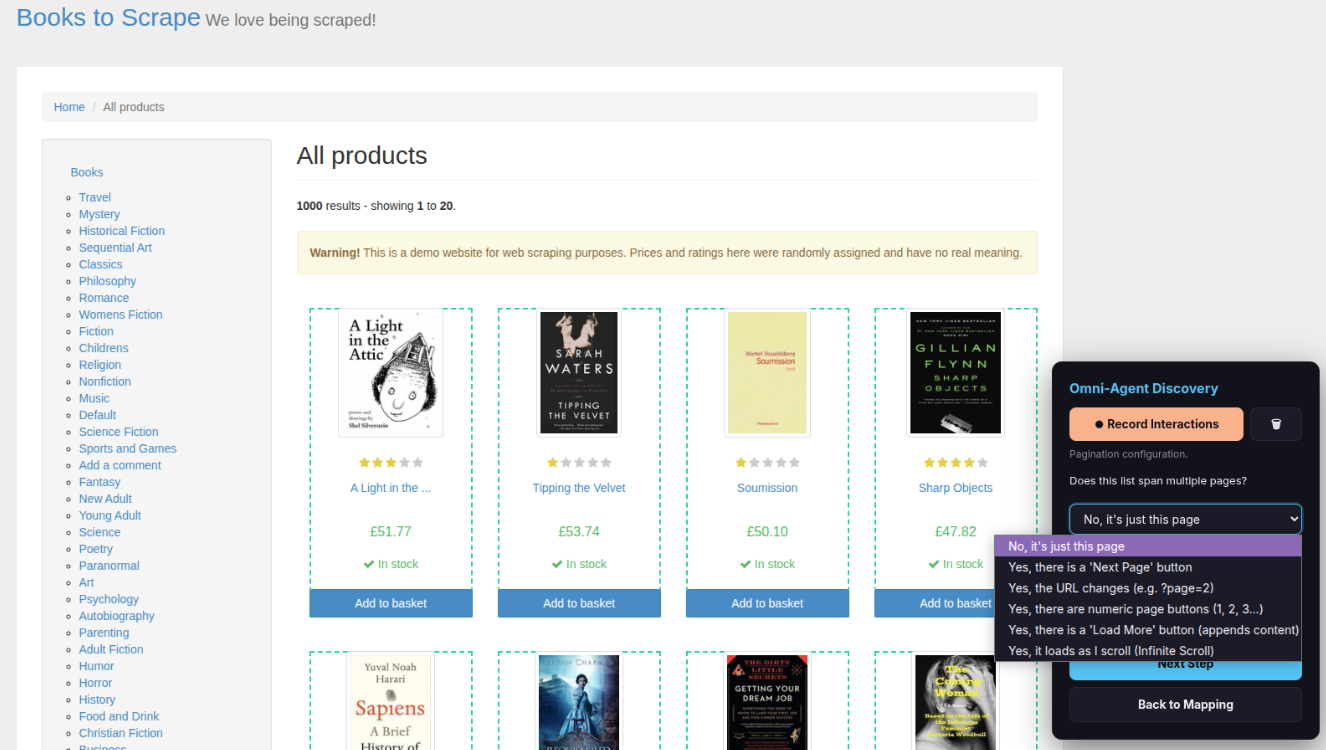
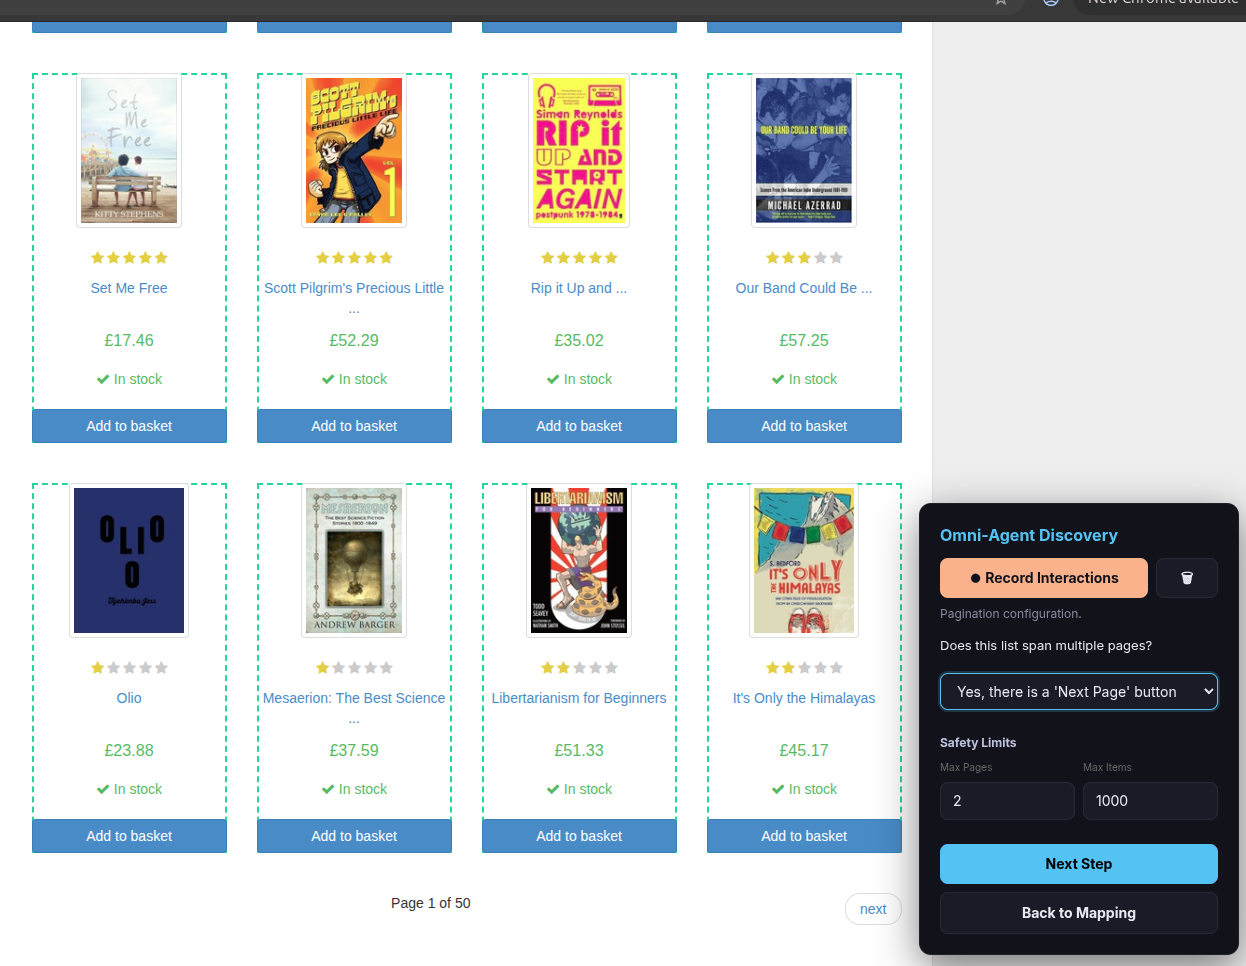
The overlay now asks: “Does this list span multiple pages?”
Choose the option that matches your website:
| Option | When to use it |
|---|---|
| No, it’s just this page | The list fits on a single page |
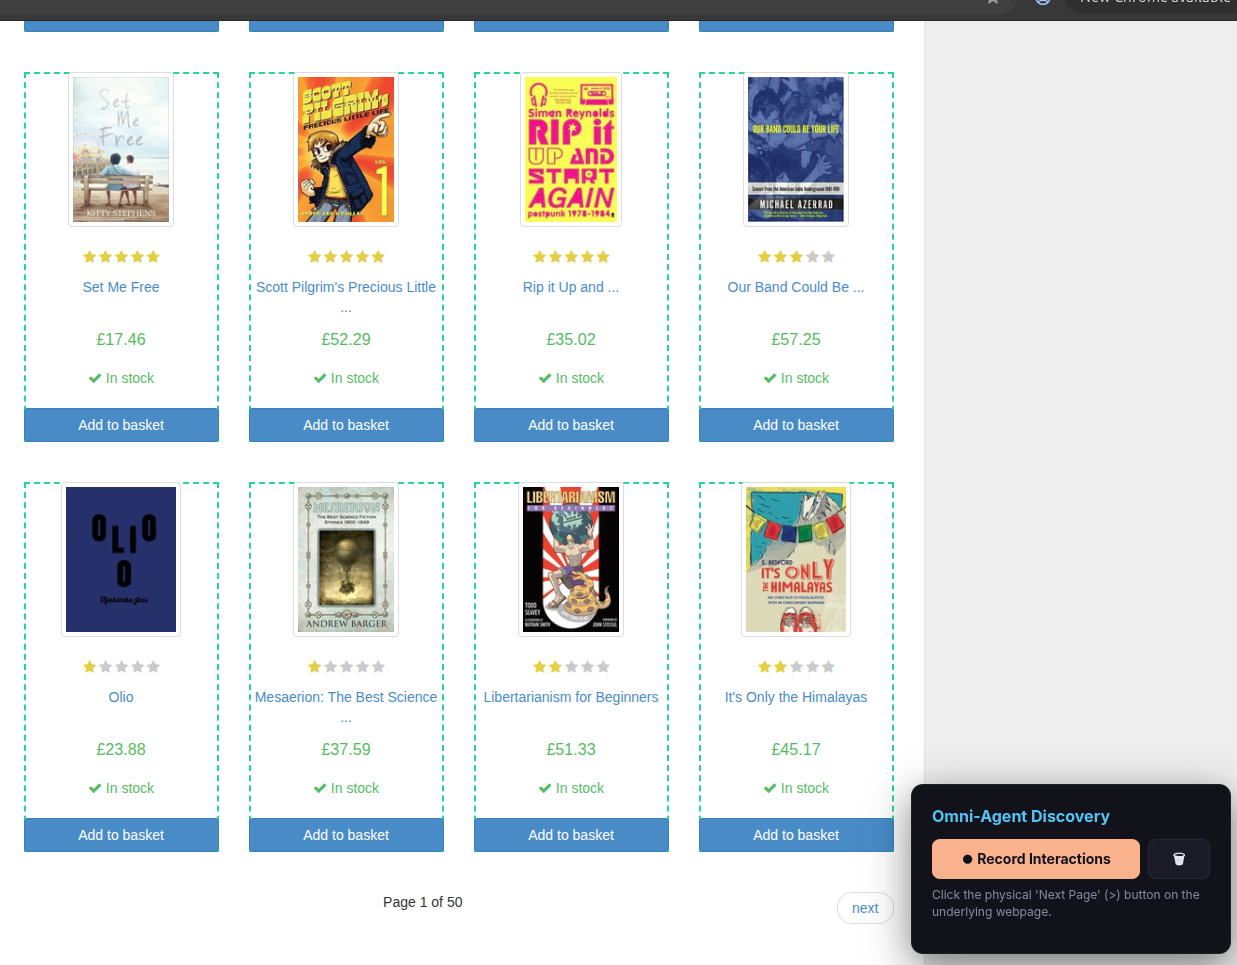
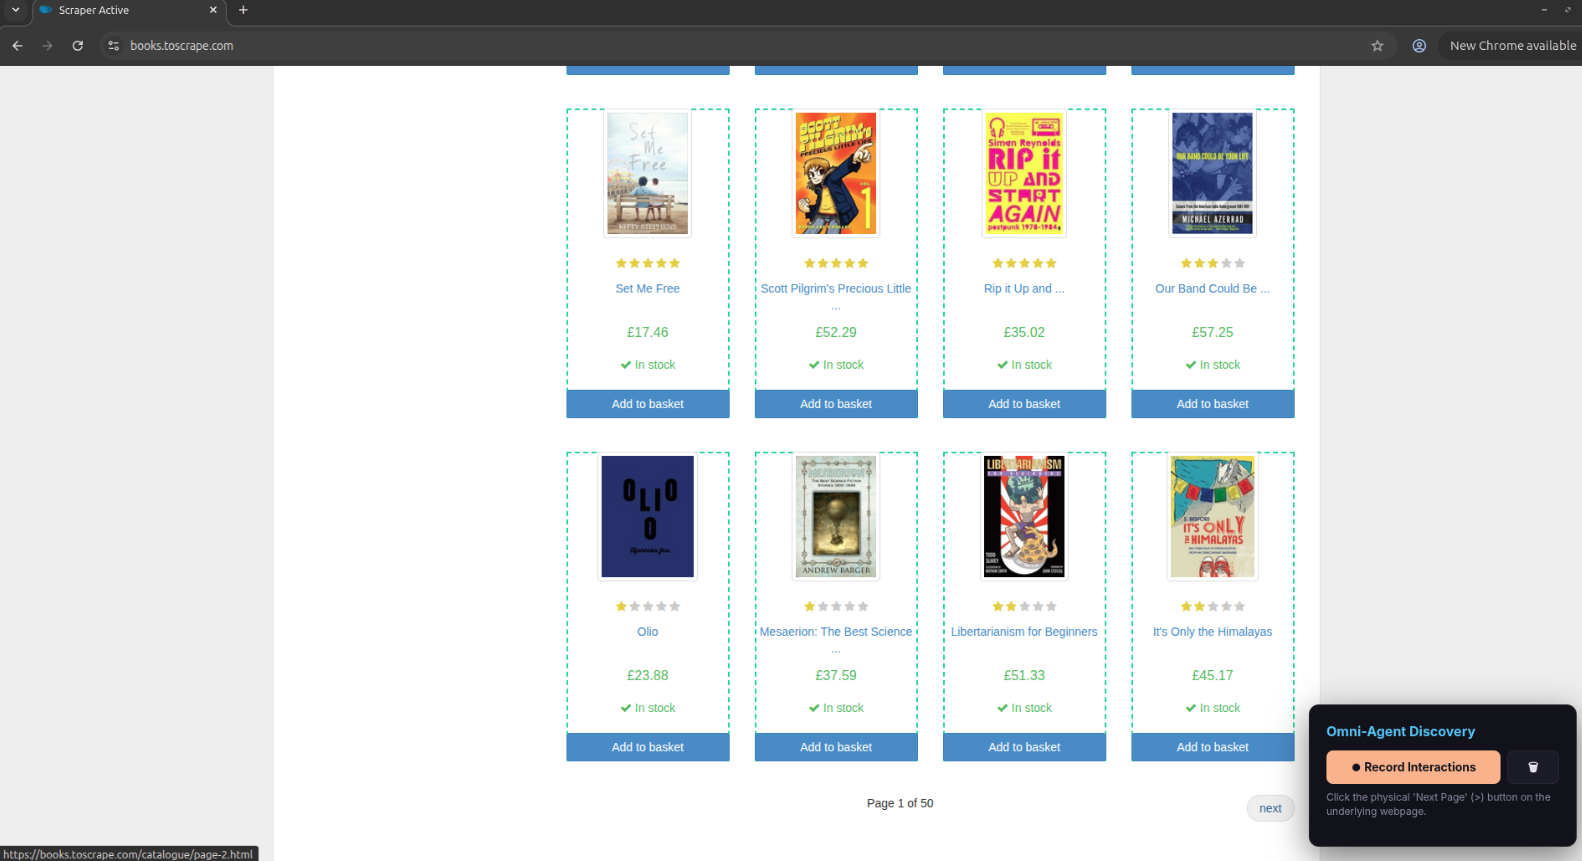
| Yes, there is a ‘Next Page’ button | The site has a “Next” or “>” button |
| Yes, the URL changes (e.g. ?page=2) | The page number appears in the URL |
| Yes, there are numeric page buttons (1, 2, 3…) | The site shows numbered page links |
| Yes, there is a ‘Load More’ button | Clicking a button appends more items |
| Yes, it loads as I scroll (Infinite Scroll) | Items appear automatically as you scroll down |
Then follow the on-screen instructions for your chosen option:
- ‘Next Page’ button: Click the actual “Next” or “>” button on the website.
- URL changes: Paste the full URL pattern including
%das the page number placeholder (e.g.,https://site.com/items?page=%d). - Numeric page buttons: Click the page button for page 2, then click the button for page 3. The scraper needs two consecutive page numbers to detect the pattern — just like the list items.
- ‘Load More’ / Infinite Scroll: Follow the on-screen prompts.
Tip — Test with small numbers first: Set Max Pages to 2 and/or Max Items to a small number. This lets you quickly verify the extraction works before running the full scrape.
Important: Choose the correct pagination method carefully. If you make a mistake, you have to start over.
Click Next Step when pagination is configured.
Step 7 — Choose whether you need detail pages
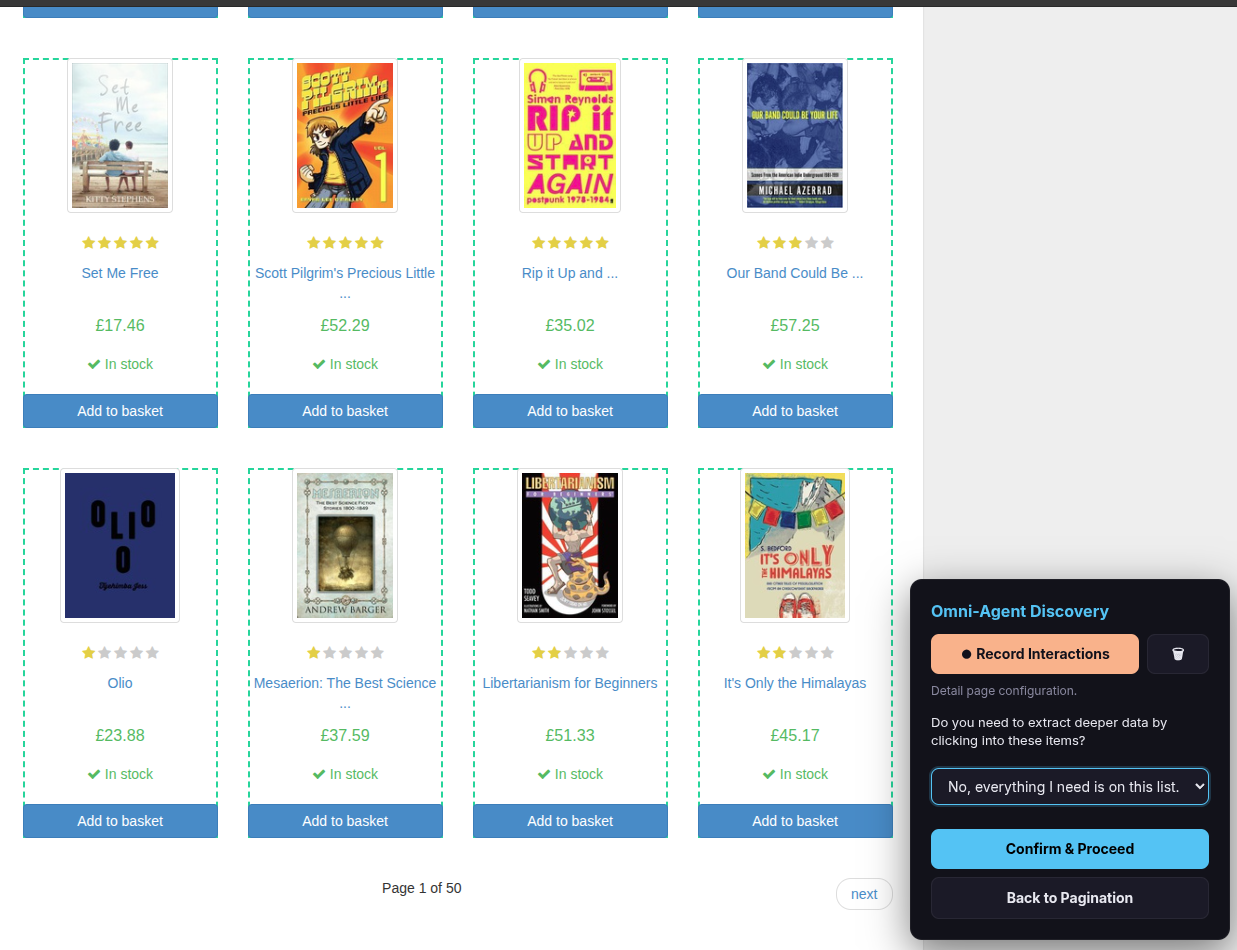
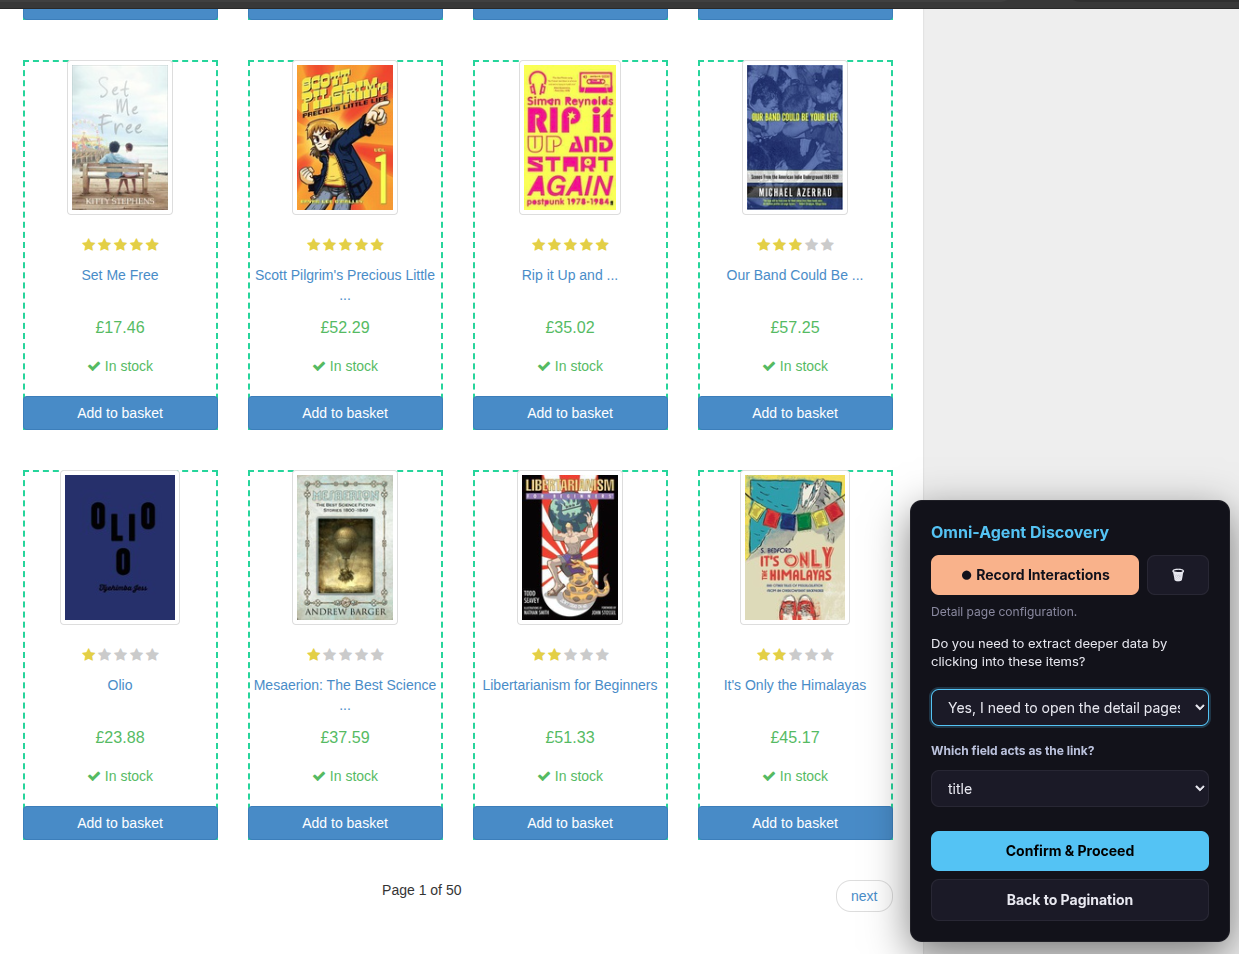
The overlay asks: “Do you need to extract deeper data by clicking into these items?”
If all the data you need is already visible in the list, select “No, everything I need is on this list” and click Confirm & Proceed. Skip ahead to Step 12.
If you need additional data from inside each item (e.g., full description, ISBN, specifications), select “Yes, I need to click into items for more details” and click Confirm & Proceed. Continue to Step 8.
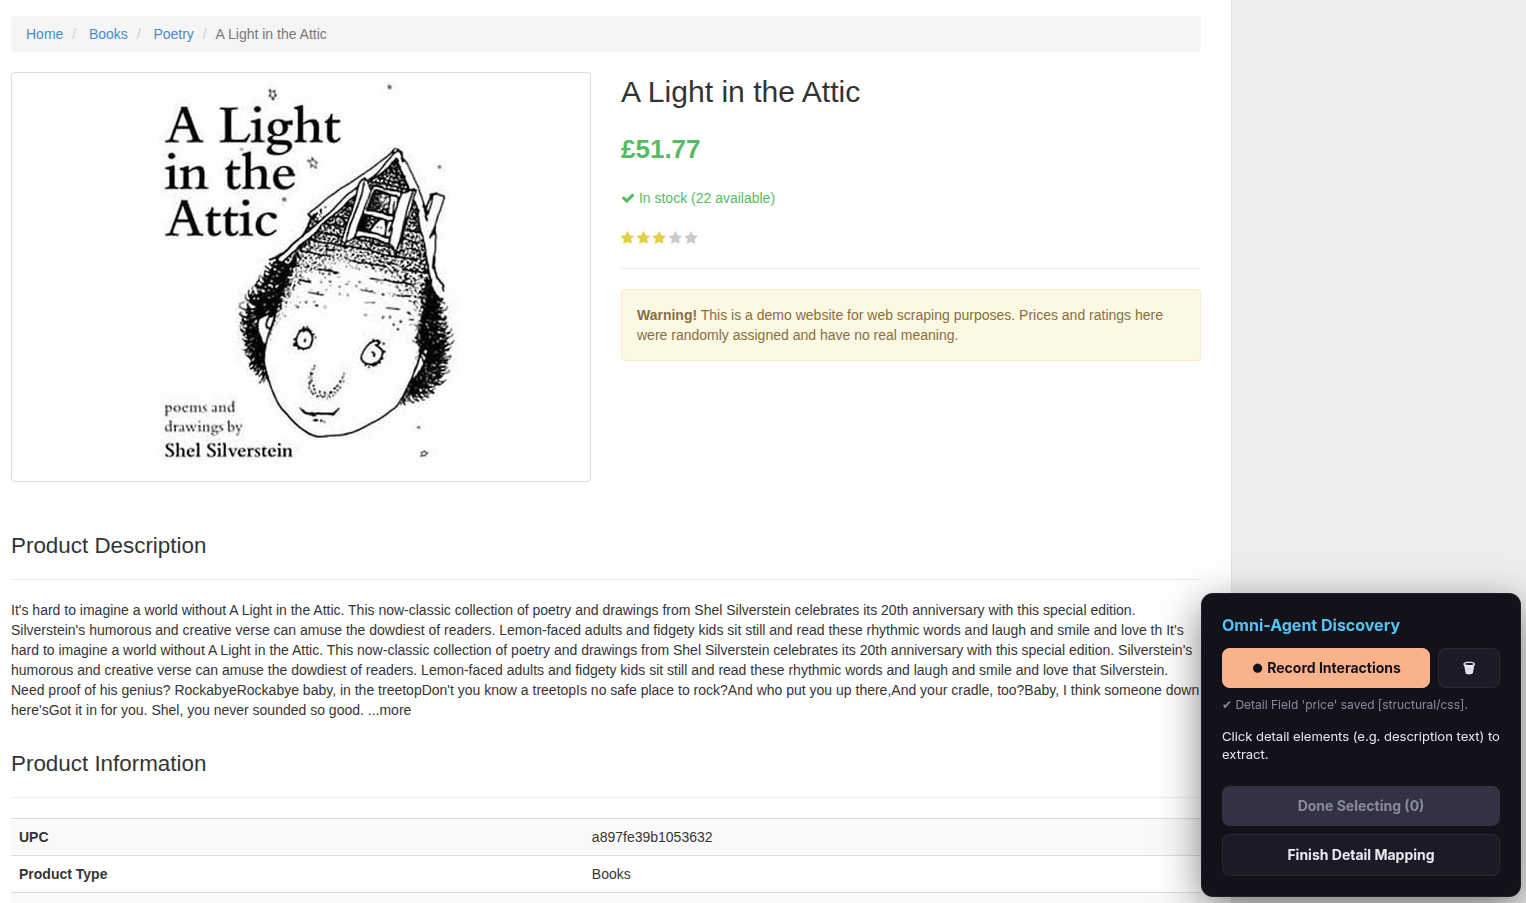
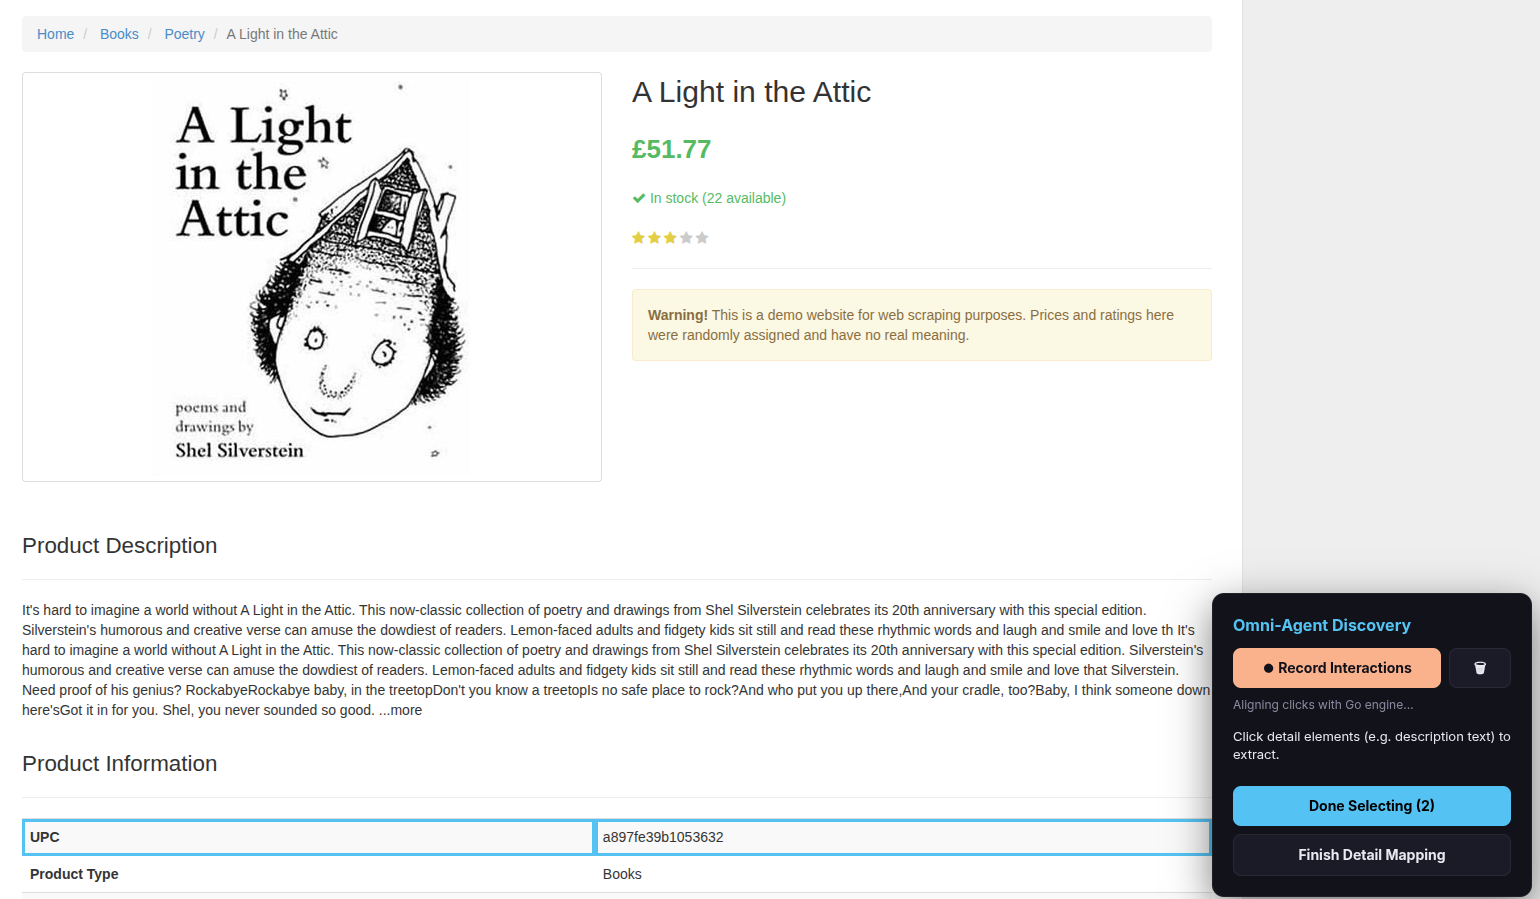
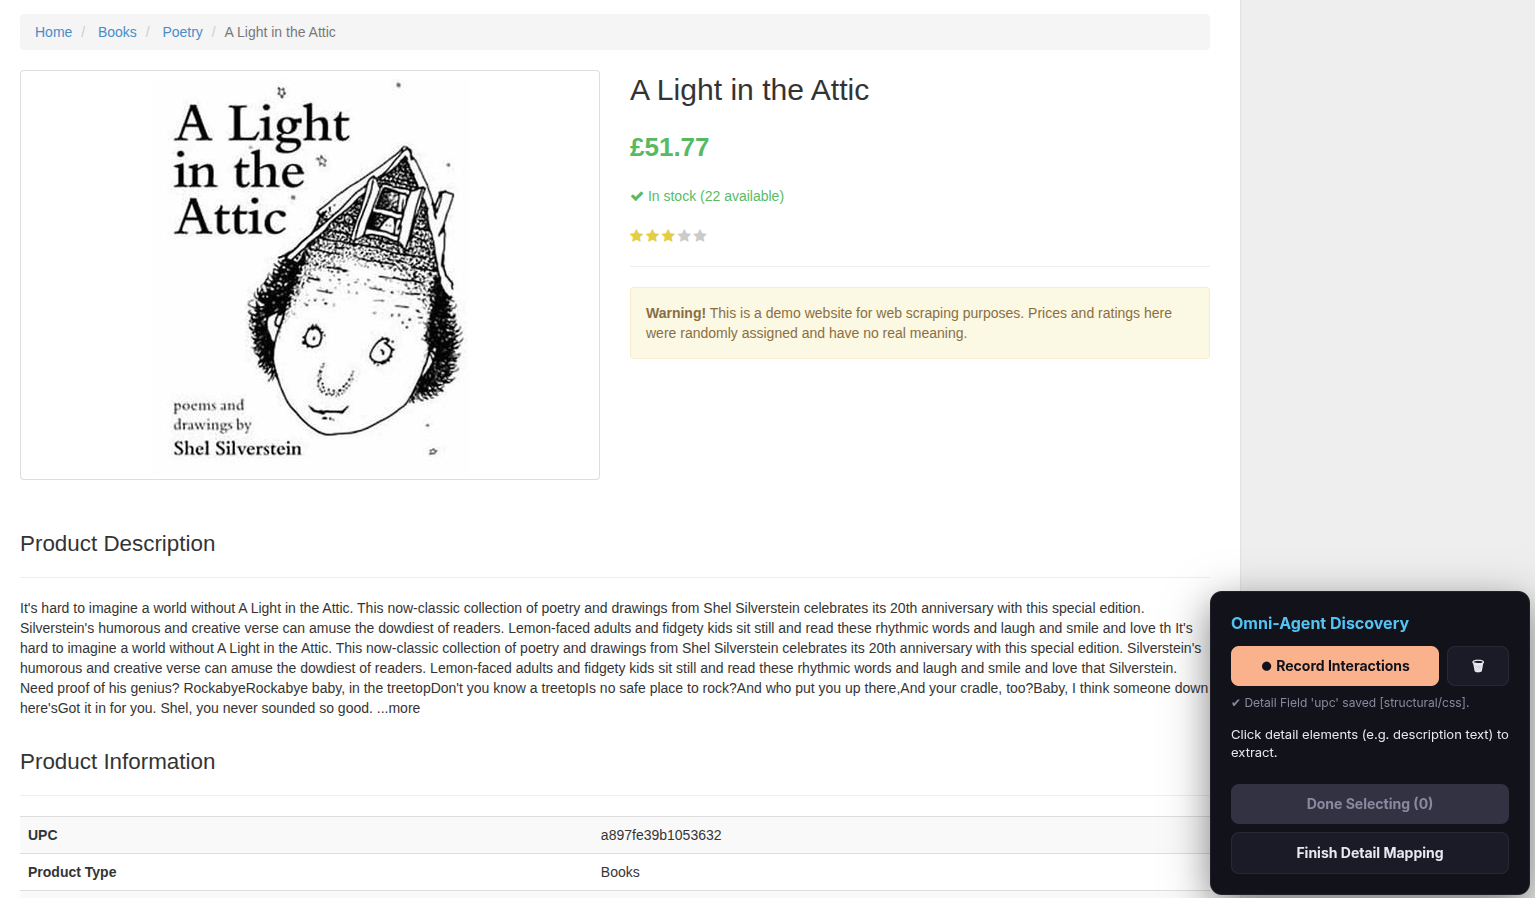
Step 8 — Map detail fields
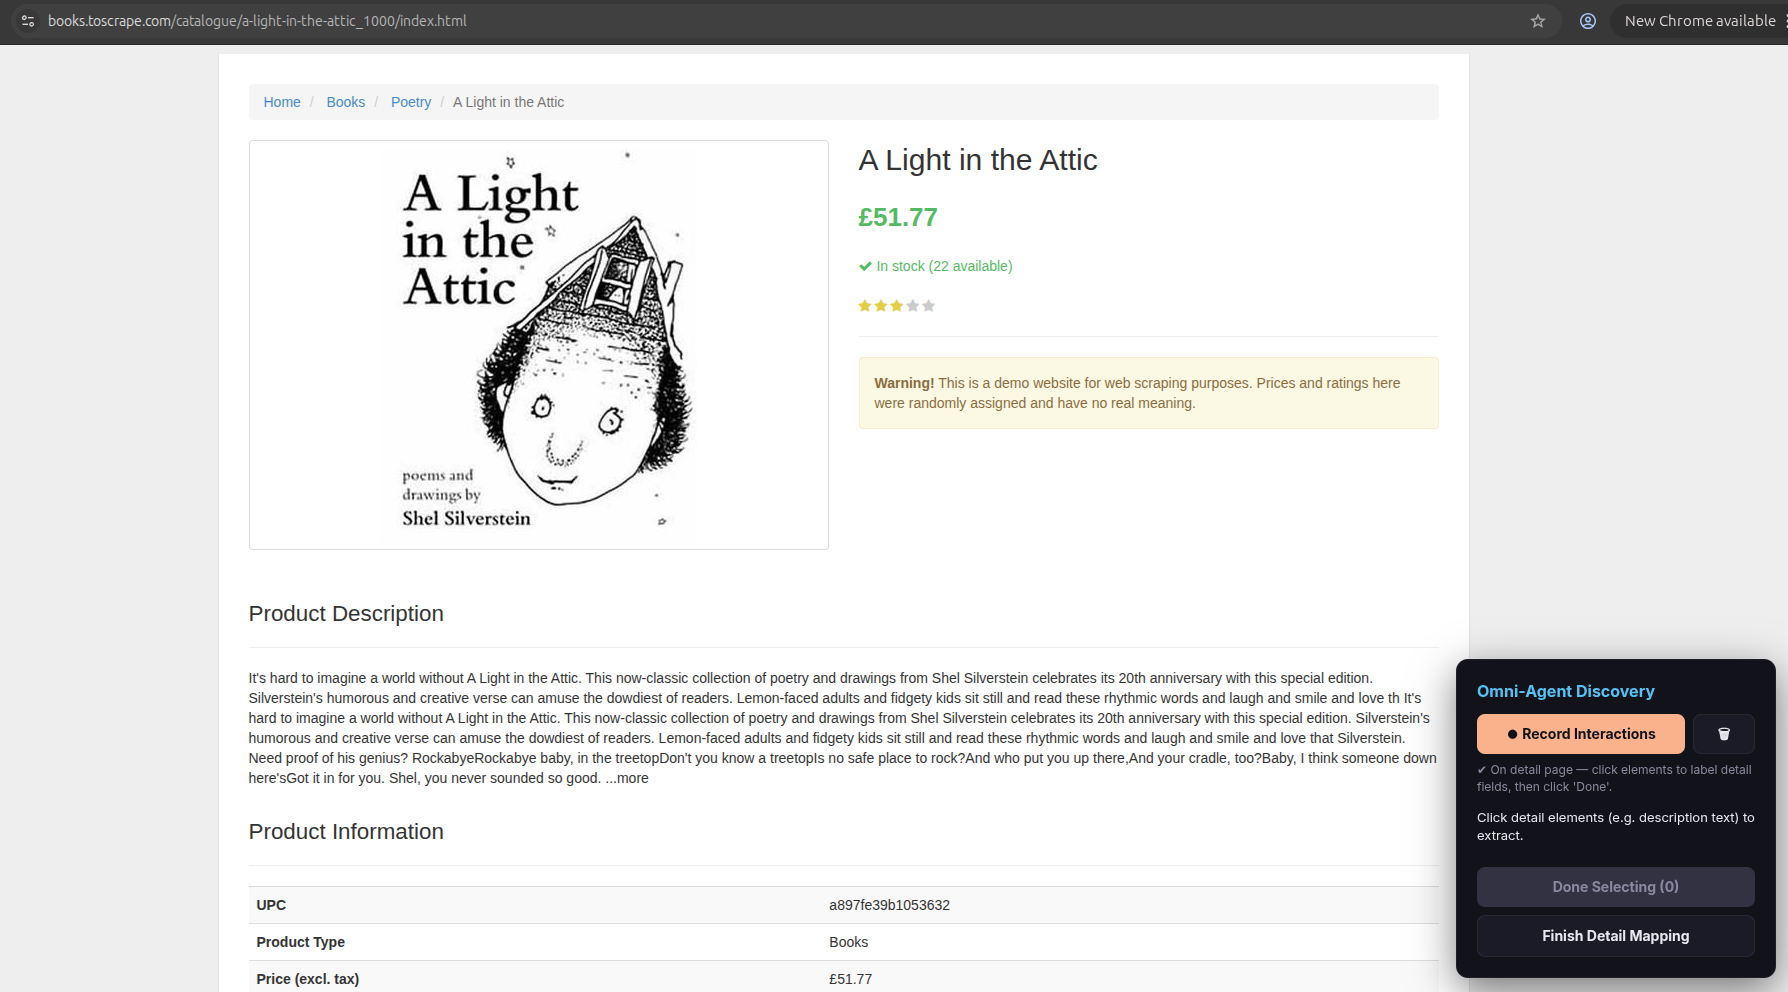
The scraper navigates into the first item’s detail page. The overlay is now in detail mapping mode.
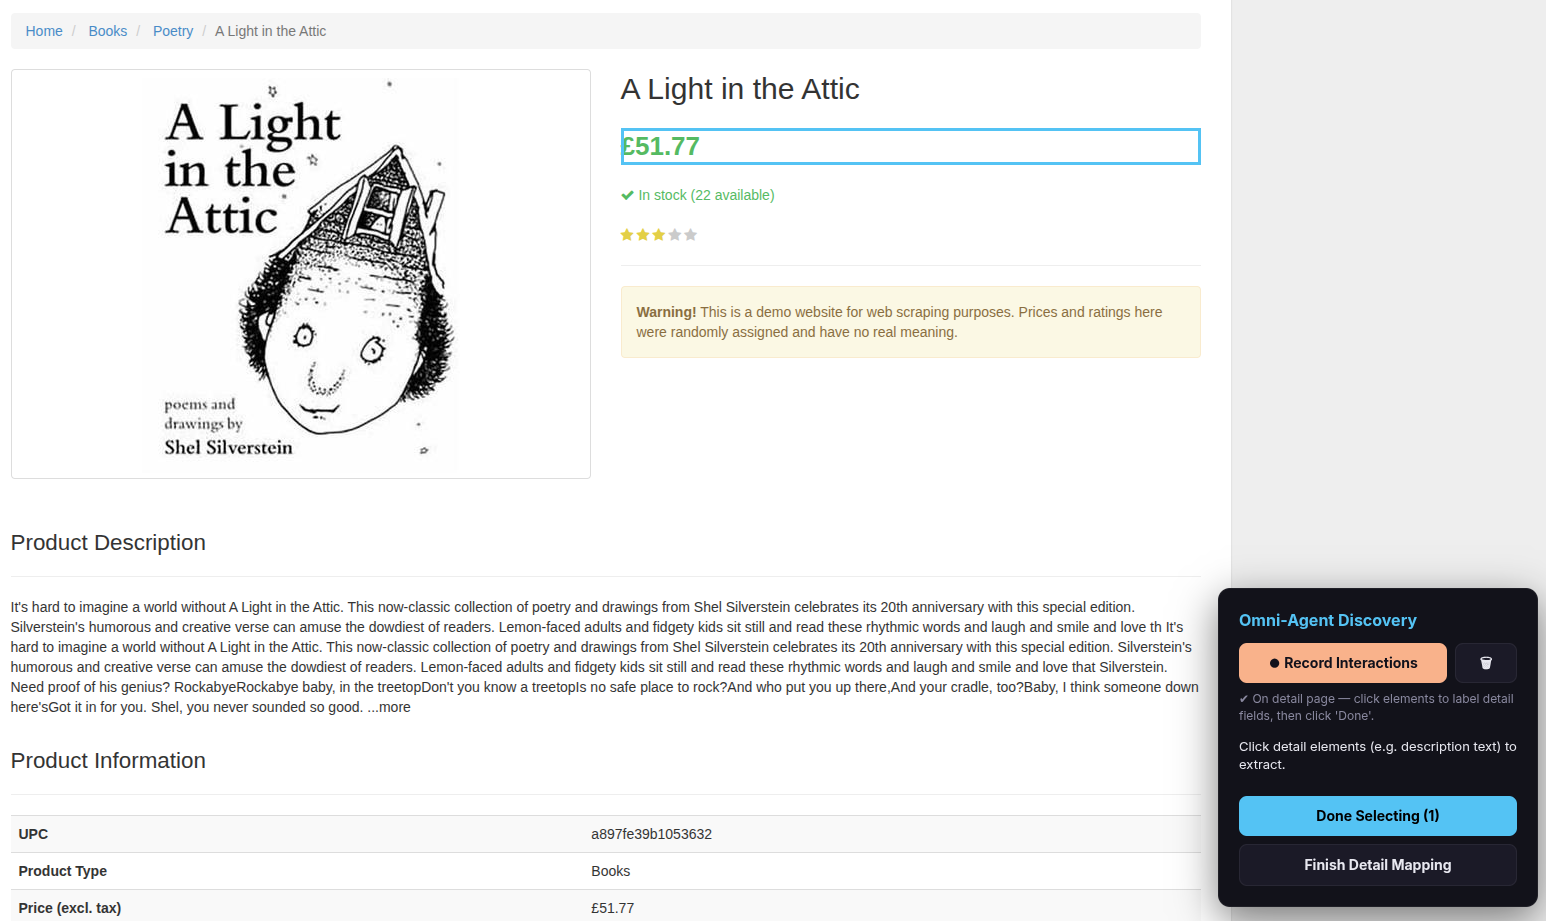
For a single detail item (e.g., a price, a description, an author name):
- Click the element on the page.
- Click Done Selecting.
For a key/value pair (e.g., a table row like “Author: Jules Verne”):
- Click the key element (e.g., the text “Author:”).
- Click the value element (e.g., the text “Jules Verne”).
- Click Done Selecting.
Step 9 — Name the detail field
- Enter a Field Name (e.g.,
price,description,isbn). - Choose Data to Extract (Text Content, Link URL, or Image URL).
- Choose Extraction Strategy (usually leave as Auto).
- Click Save Field.
Step 10 — Add more detail fields or finish
Repeat Steps 8–9 for each additional detail field you want.
When done, click Finish Detail Mapping.
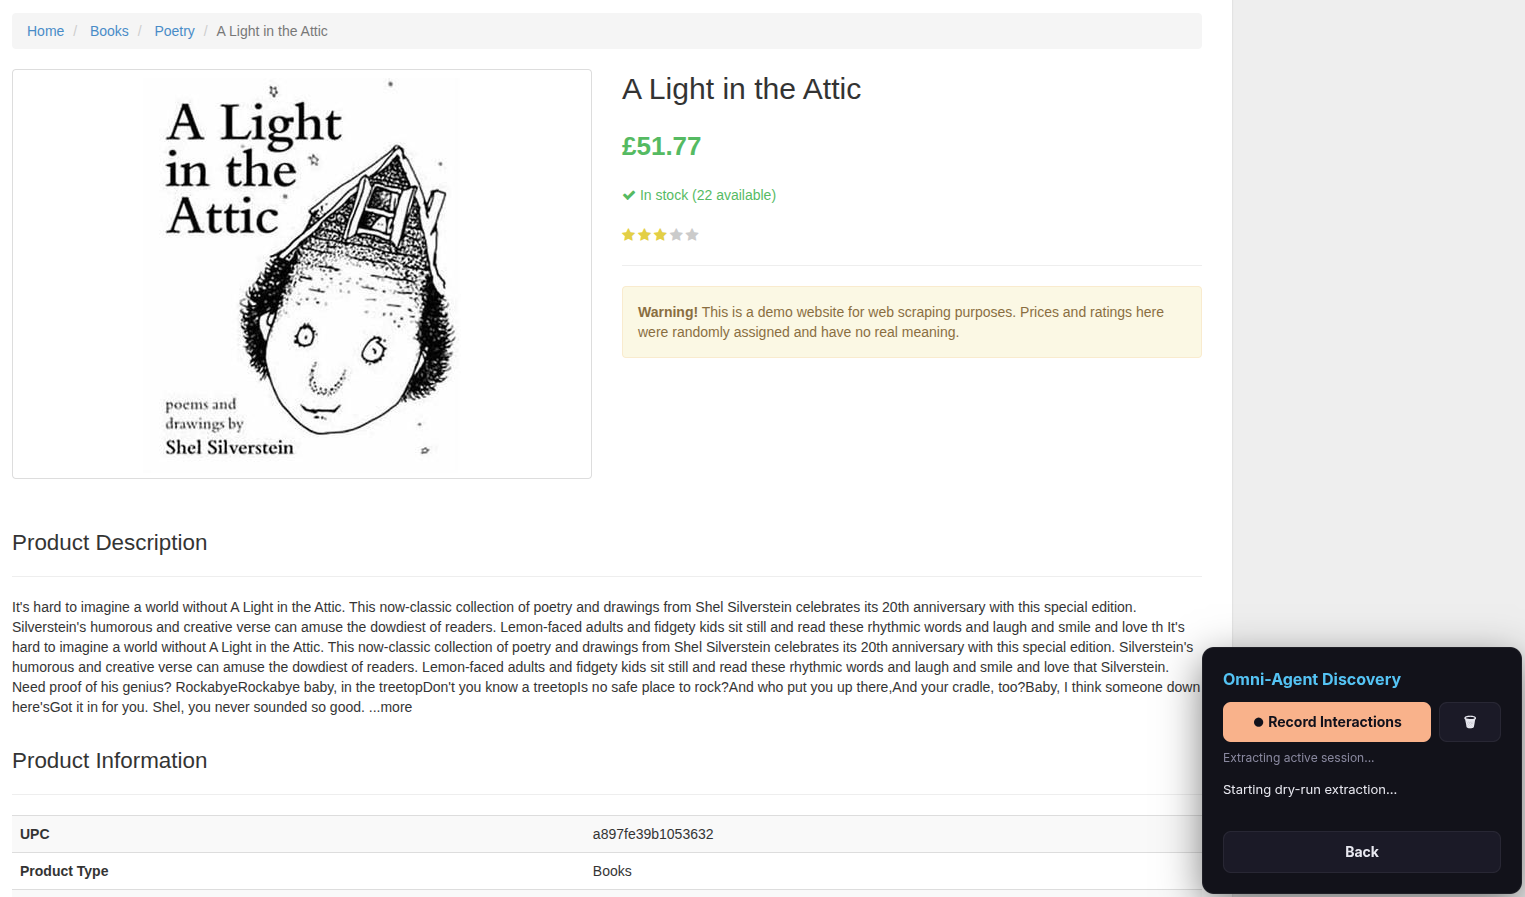
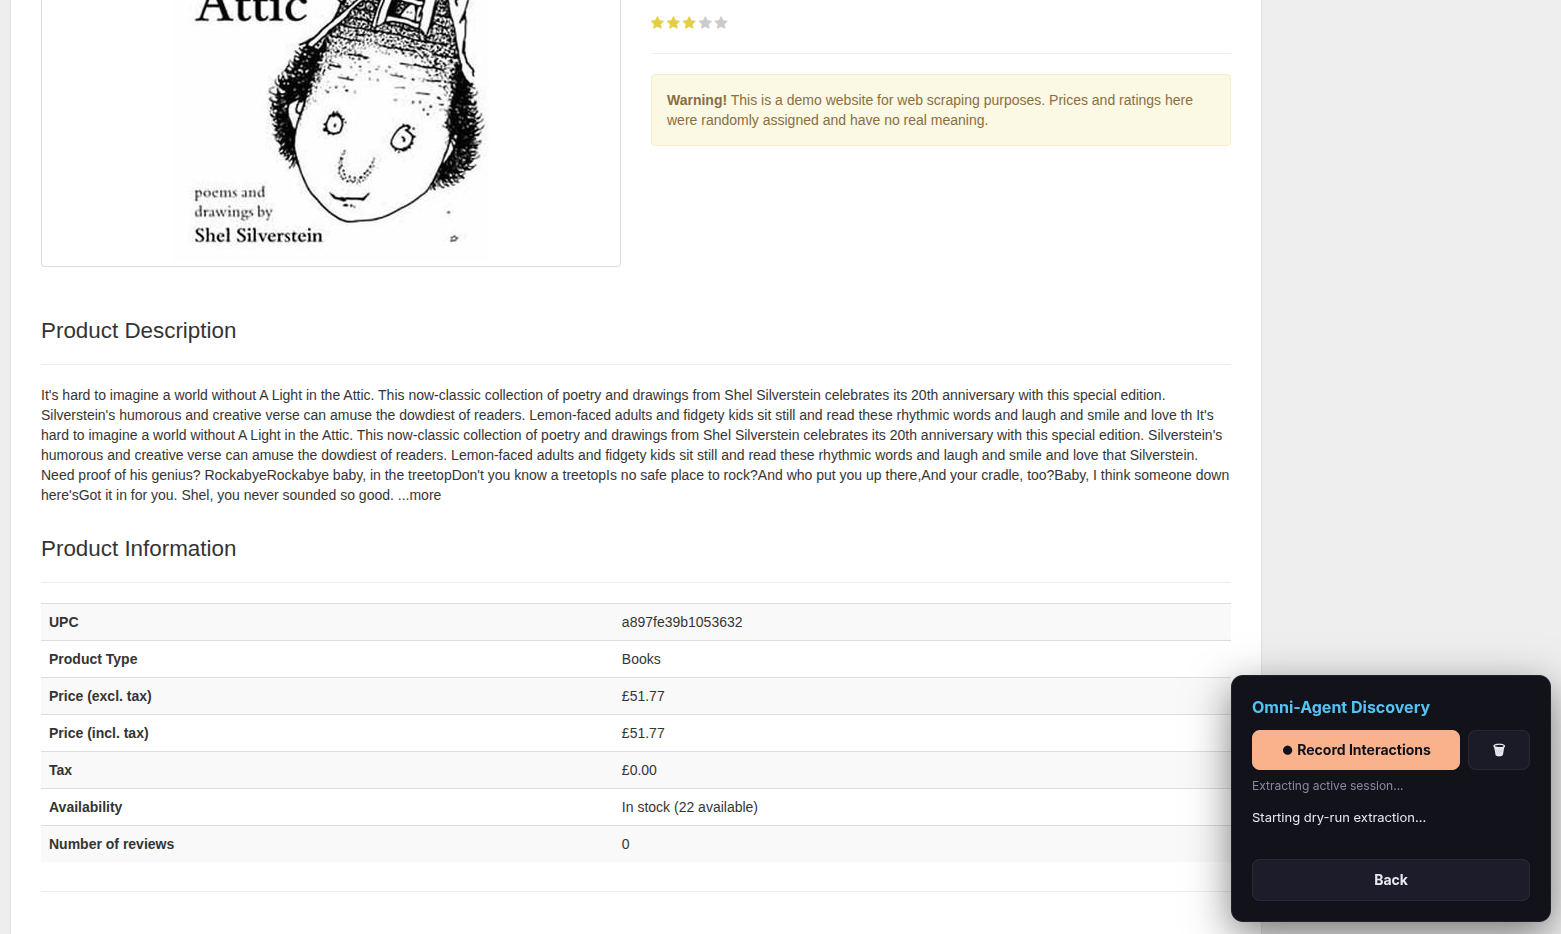
Step 11 — Wait for the dry-run extraction
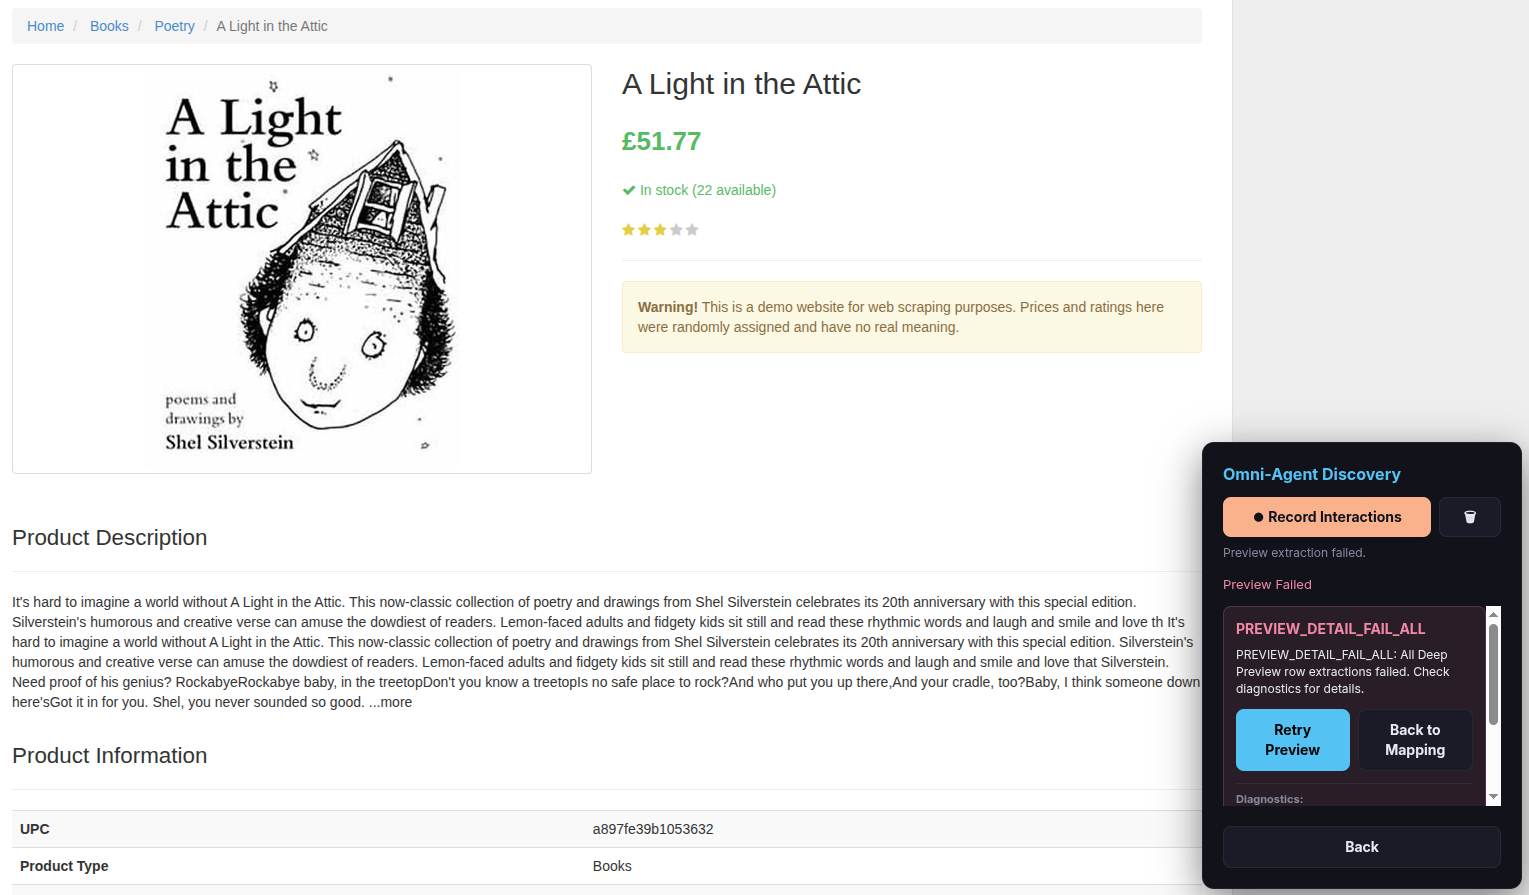
The scraper now performs a quick test run. You will see browser tabs opening and closing automatically as it validates your configuration on a few pages.
Tip: Be patient — this can take a couple of minutes depending on the website’s complexity.
Step 12 — Verify and approve
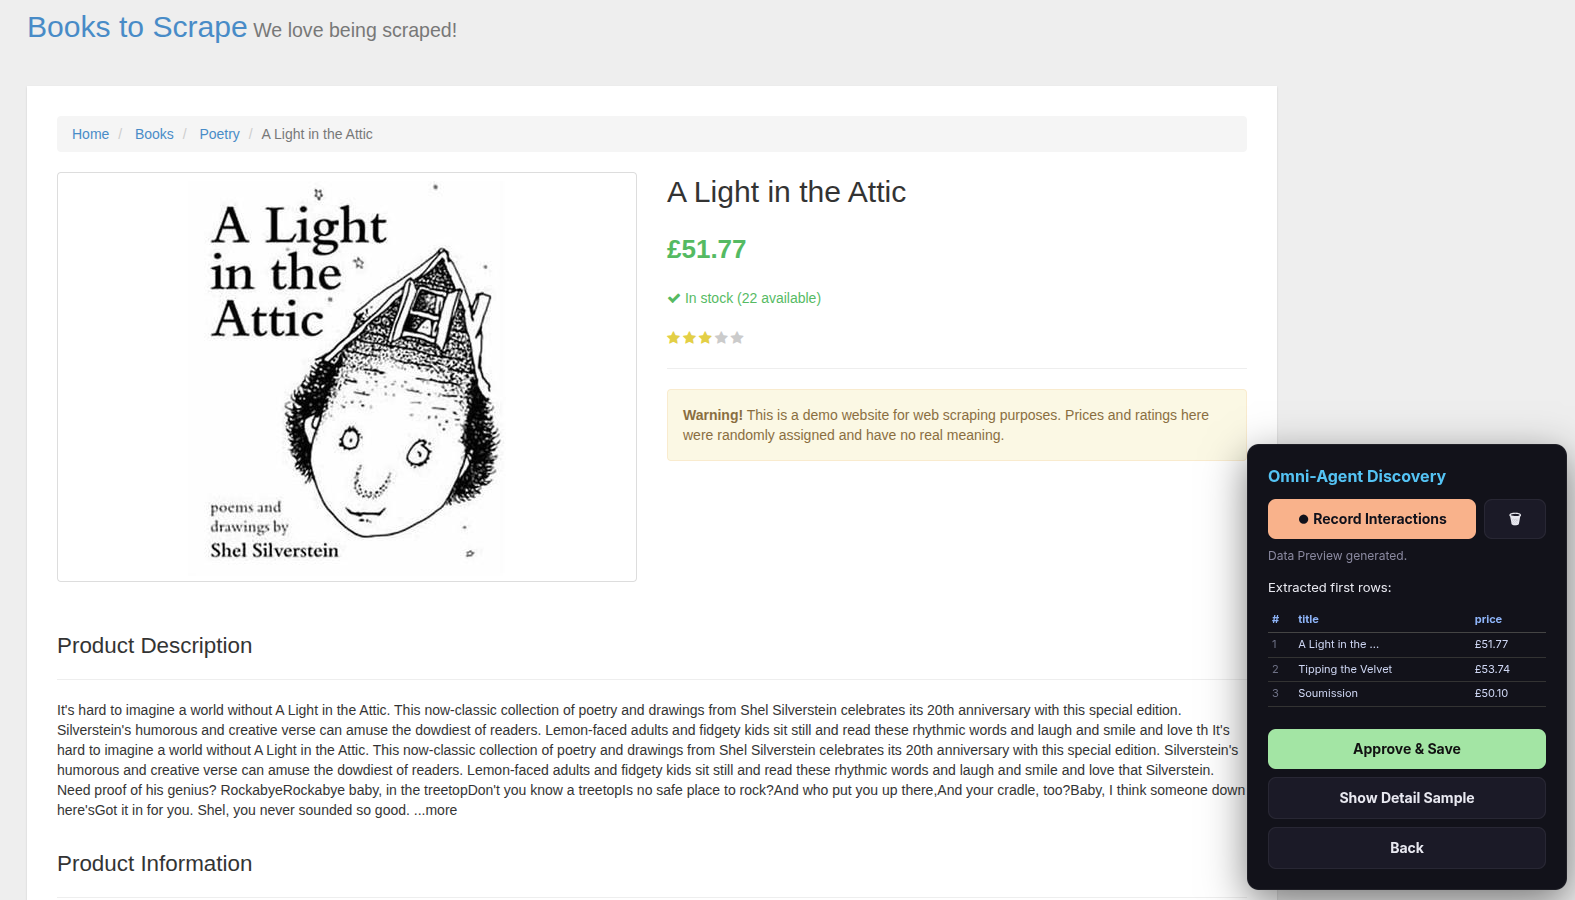
The overlay shows a preview table of the first extracted rows. Check that the data looks correct.
- Click Approve & Save if the data looks good.
- Click Back if something is wrong and you need to redo a step.
Step 13 — Save Intent
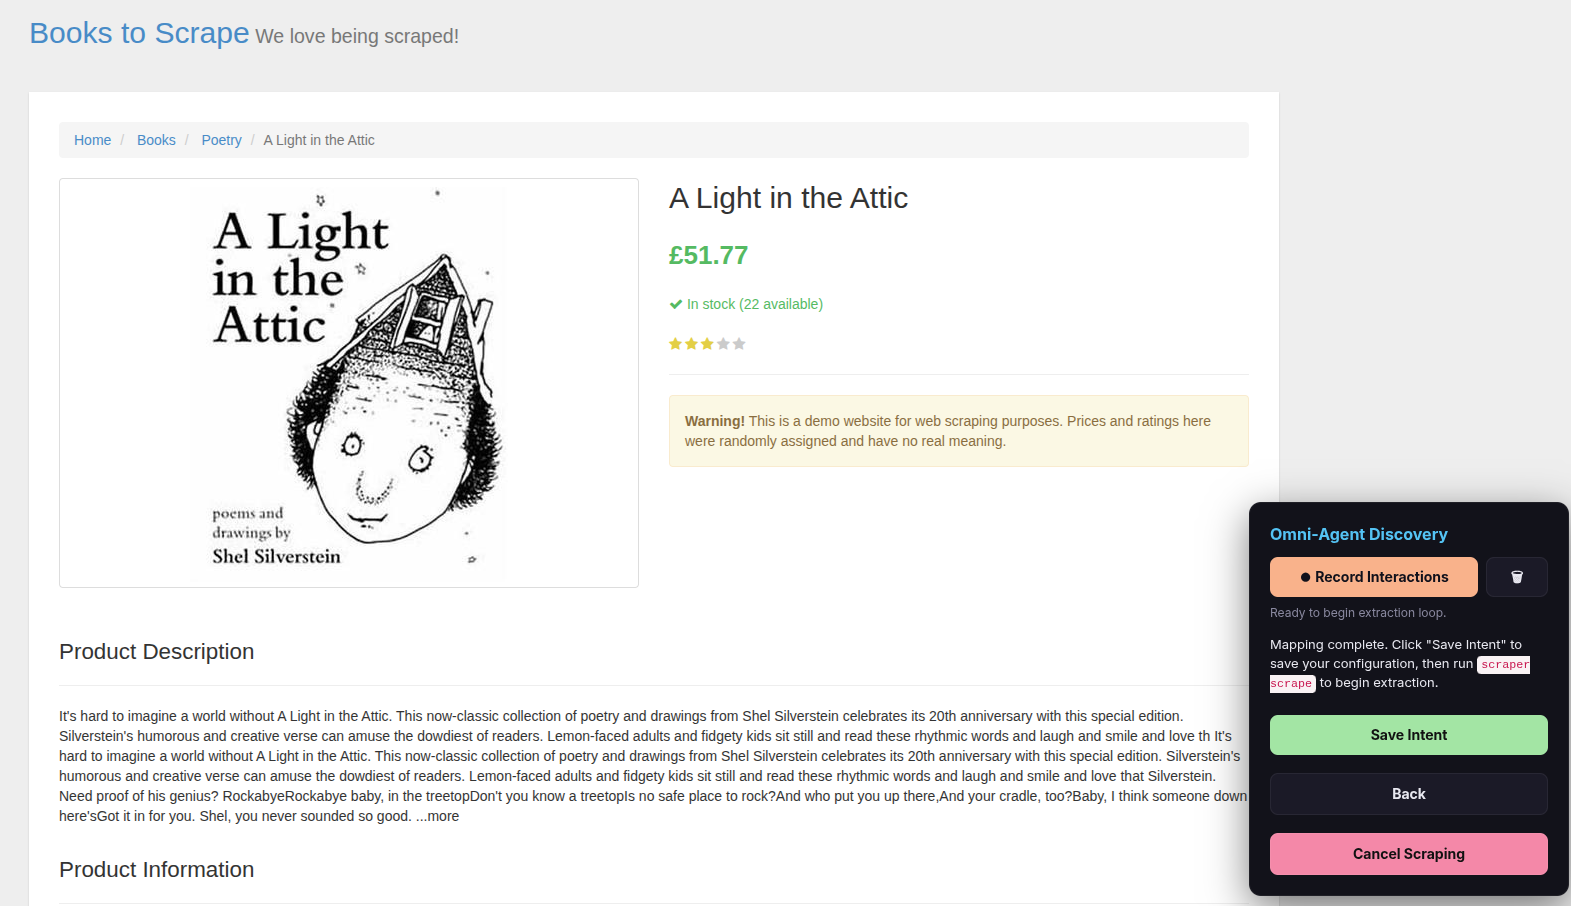
Click Save Intent. This saves your complete scraping configuration (called an “intent”) so it can be reused and automated later.
Step 14 — Done
You are returned to Mission Control. The engine logs show the scrape running and you can see total rows being extracted. Your data is saved as CSV (opens directly in Excel) and JSON files in the mission folder.
Quick Tips
| Situation | What to do |
|---|---|
| Clicked the wrong element | Click it again to undo |
| Want to test before full scrape | Set Max Pages to 2 |
| URL pagination with page numbers | Use %d as the placeholder (e.g., https://site.com/items?page=%d) |
| Numeric page buttons | Click two consecutive page numbers (e.g., page 2 then page 3) |
| Need to automate recurring scrapes | Run scraper scrape from the terminal using a scheduler (e.g., cron) |
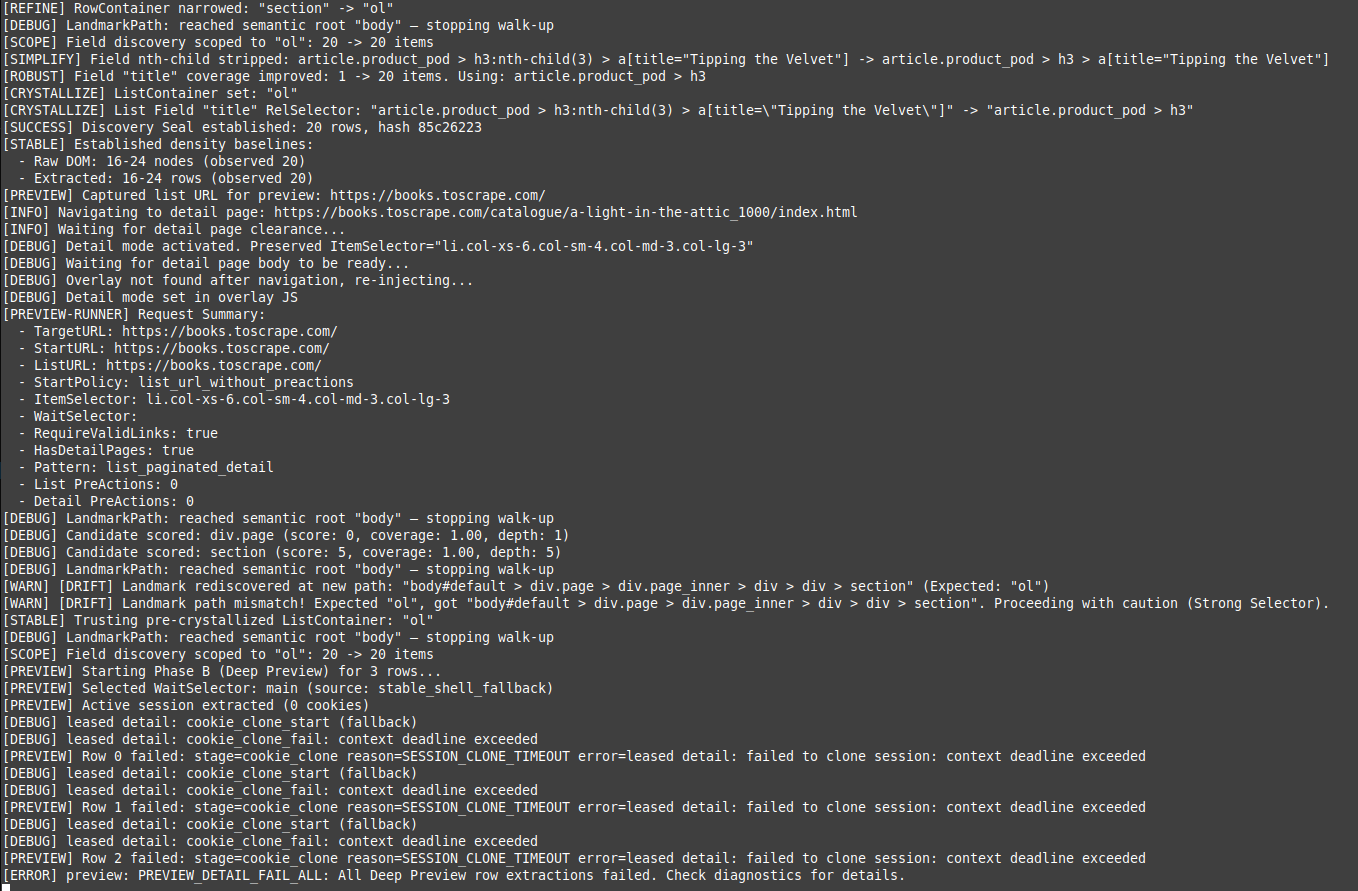
| Encounter an error | Send the project folder contents for diagnostics and troubleshooting |
Common Challenges for Beginners
- Not starting from the right URL. Always start from the page that shows the list of items, not the homepage.
- Clicking only one item. The scraper needs at least two items to detect the pattern.
- Choosing the wrong pagination type. Browse the site manually first to understand how it handles pages.
- Rushing through setup. Take time to explore the website before starting. Every mistake means restarting.
- Expecting instant results on large sites. Scraping thousands of items across hundreds of pages takes time. Start small, verify, then scale up.